
Prise en charge intégrale
Dépannage et réparation HP DesignJet T770
à Lyon et en Rhône-Alpes
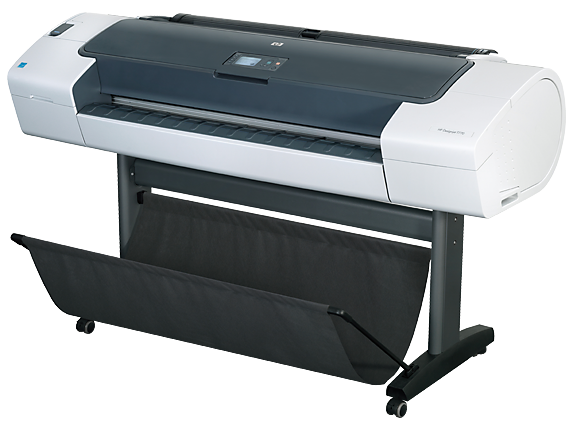
Spécialistes HP DesignJet depuis 1994.
Nous prenons en charge votre HP DesignJet T770 de A à Z.
30 années d'expertise
Spécialiste HP DesignJet depuis 1994
Un technicien, pas un standard
Vous parlez directement à un expert
Devis en 2 heures
Intervention sur site en 48 h
Rhône-Alpes
Lyon, Grenoble, Annecy, Chambéry…
VOTRE TRACEUR T770 EST EN PANNE ?
Dépannage et réparation du HP DesignJet T770 sur site
Basés à Lyon, nous sommes idéalement situés pour dépanner et réparer votre HP DesignJet T770 dans toute la région Rhône-Alpes.
Avec plus de 30 années d'expérience, nous dépannons et réparons tous les modèles HP DesignJet, des versions les plus anciennes aux dernières générations.
Chez nous, les modèles que d'autres services déclarent obsolètes ou irréparables restent réparables encore longtemps. Et si la réparation échoue, l'intervention ne vous est pas facturée.
Ce que comprend notre intervention sur votre HP DesignJet T770
- Diagnostic gratuit par téléphone
- Devis de dépannage précis en 2 heures
- Dépannage en Rhône-Alpes en 48 heures
- Réparation de toutes les pannes
- Tarifs raisonnables et transparents
- Toutes les pièces détachées en stock
- Toutes nos interventions garanties 1 an sur site
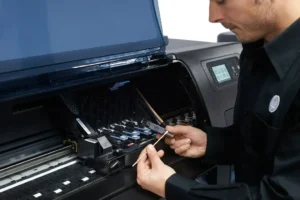
Chaque dépannage réalisé sur votre HP DesignJet T770 est couvert par une garantie 1 an sur site : si la panne réparée se reproduit dans l'année, nous revenons chez vous sans frais, pièce et main-d'œuvre comprises.
Remplacement de la courroie + révision complète : À partir de 360 € HT
Votre traceur HP DesignJet T770 affiche un code erreur 86:01 ou la courroie est déchirée ?
Notre technicien intervient sur site pour remplacer la courroie dans les règles de l'art. Le remplacement inclut le nettoyage interne complet du traceur — pas question de poser une courroie neuve dans un appareil encrassé.
Une fois la courroie remplacée, notre technicien teste la qualité d'impression, nettoie les têtes d'impression et optimise les réglages. Au départ du technicien, votre HP DesignJet T770 aura droit à une seconde jeunesse.
Avant d'engager une réparation lourde, il vaut la peine de se demander si elle en vaut encore la peine : notre page réparer ou remplacer son traceur donne les cinq critères que nous passons en revue au téléphone. Et si le remplacement s'impose, nous rachetons votre HP DesignJet T770, en état de marche ou non.
VOUS AVEZ BESOIN DE CARTOUCHES D'ENCRE ?
Nous avons en stock toutes les cartouches pour HP DesignJet T770
- Stock important et permanent
- Livraison en 24h à Lyon — 48h France entière
- Cartouches originales HP uniquement
- Têtes d'impression également disponibles
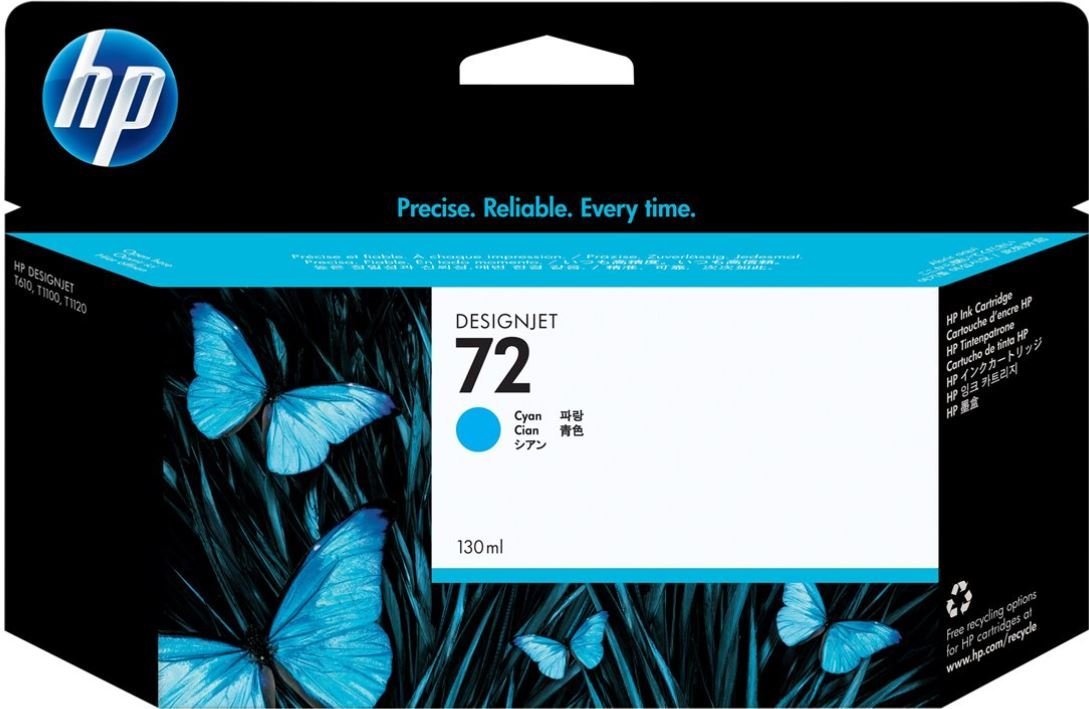
C9371A HP 72
79 €HT C9371A HP 72
55 €HT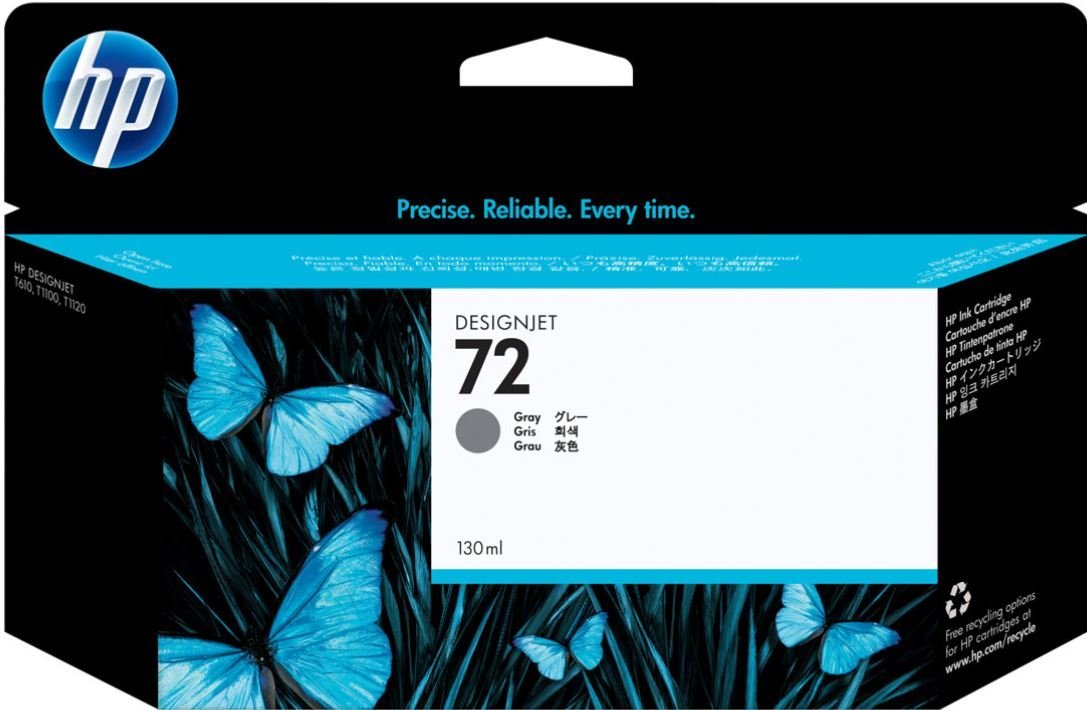
C9374A HP 72
79 €HT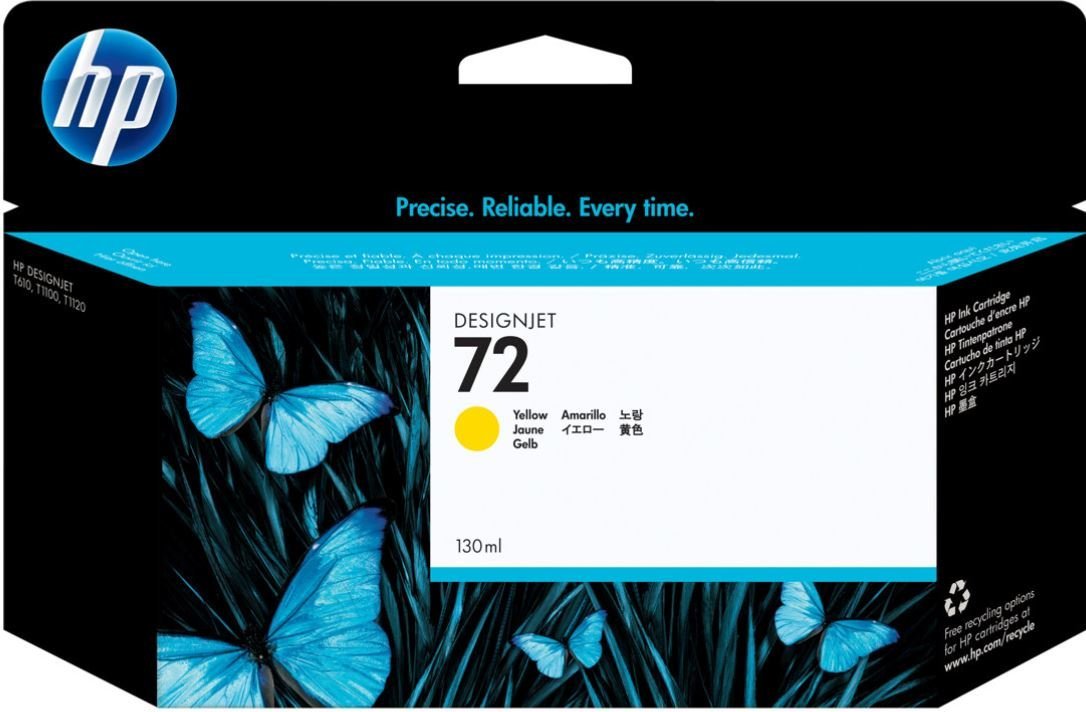
C9373A HP 72
79 €HT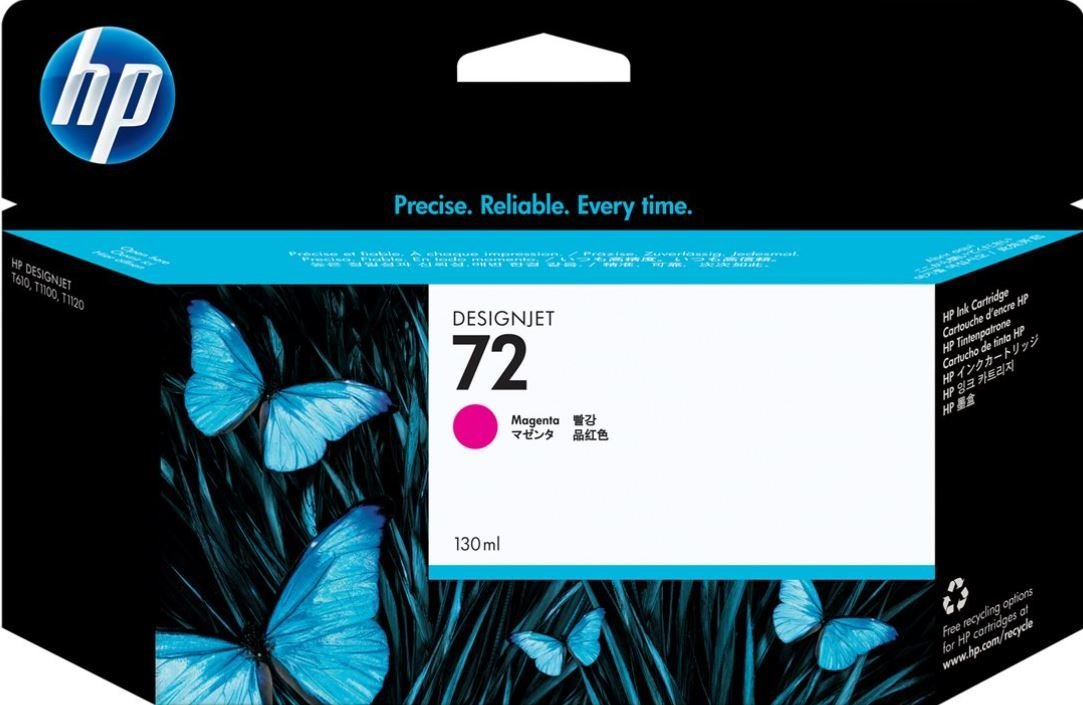
C9372A HP 72
79 €HT C9372A HP 72
55 €HT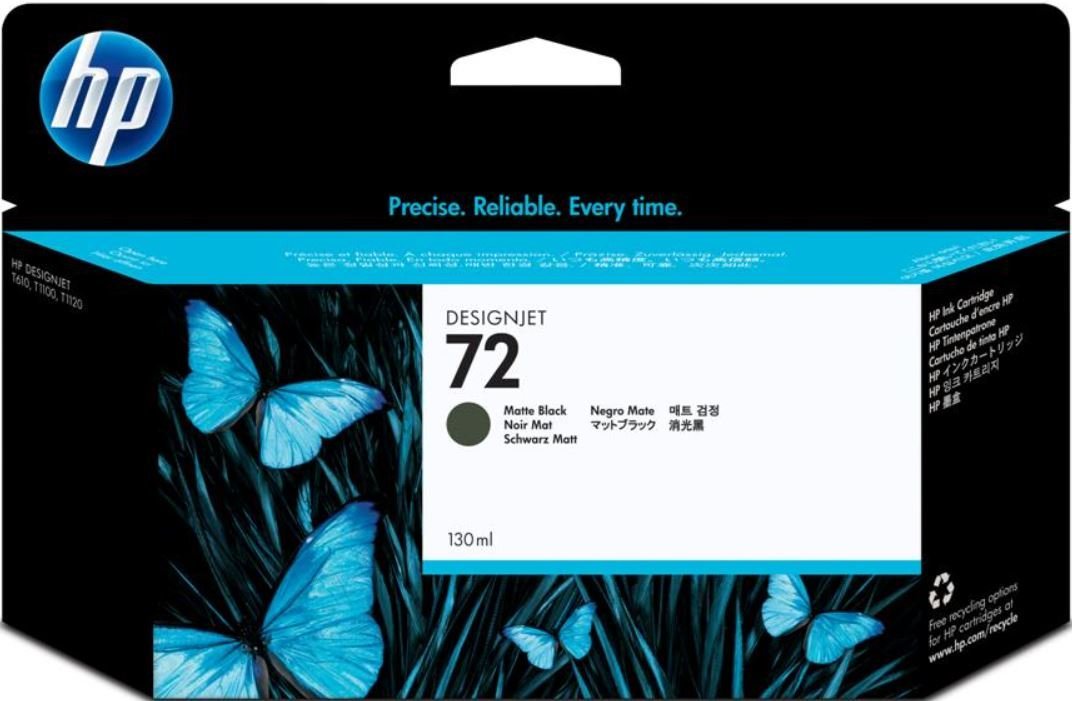
C9403A HP 72
79 €HT C9403A HP 72
55 €HT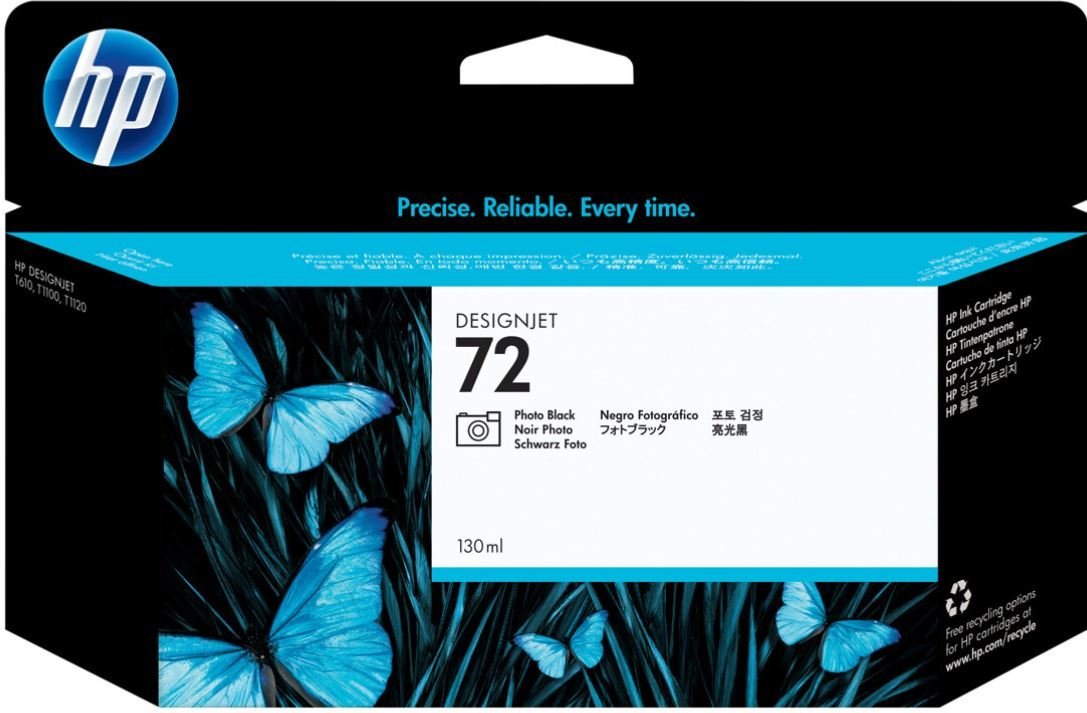
C9370A HP 72
79 €HT C9370A HP 72
55 €HTFaites défiler dans le cadre pour voir toutes les cartouches correspondant à votre modèle.
Prolongez la vie de votre traceur
Contrat de maintenance
Pour HP DesignJet T770
Inclus dans les trois formules
- Nettoyage interne, graissage…
- Contrôle courroie, service station...
- Mise à jour firmware, réglages
- Tests d'impression, amélioration qualité
- Assistance téléphonique illimitée
- Télémaintenance avec TeamViewer
- Priorité sur les dépannages - garantis en 48h
En plus avec Privilège et Premium
- Main-d'œuvre illimitée incluse
- Déplacements illimités inclus
En plus avec Premium uniquement
- Pièces détachées incluses
- Carte mère incluse
- Remplacement préventif des pièces d'usure

RESSOURCES TECHNIQUES
Tout ce dont vous avez besoin sur le HP DesignJet T770
Toutes nos ressources et nos 30 années d'expérience à votre disposition.
Pilotes d'impression, utilitaire d'impression PDF, codes erreur, pannes fréquentes, nomenclature des pièces détachées
Codes erreur fréquents
Chaque code renvoie à une pièce défectueuse précise — cliquez sur + pour l'explication complète
-
03:10
Une erreur 03:10 indique que le traceur HP DesignJet T770 a un problème d'alimentation secteur.
+le code erreur 03:10 indique que le bloc d'alimentation est HS.
Son remplacement est complexe car il nécessite un démontage important.Cause :
Le bloc d'alimentation du traceur HP DesignJet T770 ou un élément du bloc d'alimentation est HS. Souvent ce message est aléatoire au début et redémarrer le traceur HP DesignJet T770 peut être suffisant pour faire disparaitre le message et utiliser le traceur HP DesignJet T770. Mais en général, l’erreur 03:10 se produit à nouveau, devient permanente et bloquante. Il faut alors faire intervenir un technicien pour remplacer la pièce défectueuse. Dès la première apparition du code erreur 03:10 sur l'écran de votre traceur HP DesignJet T770, faites-nous intervenir pour éviter un problème qui tôt ou tard bloquera votre traceur HP DesignJet T770 et votre production.
Intervention technicien :
Prévoir une intervention de 2 heures + déplacement + pièce.
-
08:11
Un traceur HP DesignJet T770 qui affiche un code erreur 08:11 a un problème de carte formatter et/ou de disque dur.
+le code erreur 08:11 indique que la carte formatter et/ou le disque dur sont HS.
La pièce défectueuse doit être remplacée.Cause :
Le code erreur 08:11 apparaît sur votre traceur HP DesignJet T770 si la carte formatter et/ou le disque dur sont HS.
Intervention technicien :
Prévoir une intervention de 1 heure + déplacement + pièce.
-
21:10 ou 21:13 ou 21.2:13 ou message «Maintenance recommandée»
Un traceur HP DesignJet T770 qui affiche un code erreur 21:10 ou 21:13 indique qu’il y a un problème de Station Service.
+le code erreur 21:10, 21:13, 21.2:13 indique que la station service est HS. La Station service doit être remplacée.
Cause :
La station service du traceur HP DesignJet T770 est HS ou bien le chariot du traceur HP DesignJet T770 est bloqué dans la station service. Ce message peut être aléatoire au début. Redémarrer le traceur HP DesignJet T770 peut être suffisant pour faire disparaitre le message et utiliser le traceur HP DesignJet T770. Mais en général un traceur HP DesignJet T770 qui fait une erreur 21:10 ou 21:13 le fait à nouveau, et l’erreur 21:10 ou 21:13 devient permanente et bloquante. Il faut alors faire intervenir un technicien pour remplacer la pièce défectueuse. Il arrive également que le traceur HP DesignJet T770 affiche une erreur 21:10 ou 21:13 si la courroie est usée, le chariot pouvant alors se bloquer dans la Station Service. Dans ce cas, la pièce à remplacer sera la courroie et non la Station Service. Dès la première apparition du code erreur sur l’écran de votre traceur HP DesignJet T770, faites-nous intervenir pour éviter un problème qui tôt ou tard bloquera votre traceur HP DesignJet T770 et votre production.
Intervention technicien :
Prévoir une intervention de 1 heure + déplacement + pièce (station service).
-
47:01 ou 47:03
Un traceur HP DesignJet T770 qui fait une erreur 47:01 ou 47:03 indique un problème de Star wheel motor.
+le code erreur 47:01 ou 47:03 indique que le starwheels motor est HS.
Son remplacement est complexe car il nécessite un démontage important.Cause :
Le Star wheel motor du traceur HP DesignJet T770 est HS. Ce message peut être aléatoire au début. Redémarrer le traceur HP DesignJet T770 peut être suffisant pour faire disparaitre le message et utiliser le traceur HP DesignJet T770. Mais en général un traceur HP DesignJet T770 qui fait une erreur 47:01 ou 47:03 la fait à nouveau, l’erreur devient permanente et bloquante. Il faut alors faire intervenir un technicien pour remplacer la pièce défectueuse. Dès la première apparition du code erreur 47:01 ou 47:03, faites-nous intervenir pour éviter un problème qui tôt ou tard bloquera votre traceur HP DesignJet T770 et votre production.
Intervention technicien :
Prévoir une intervention d’une heure + déplacement + pièce (Remplacement du star wheel motor + mise à jour du firmware).
-
79:04
Un traceur HP DesignJet T770 qui fait une erreur 79:04 indique un problème de firmware (micrologiciel)...
+
Mais dans les faits le traceur HP DesignJet T770 est souvent victime d'un fichier corrompu...le code erreur 79:04 peut être causé par un fichier PDF corrompu.
Appelez-nous pour que nous vous aidions (gratuitement) à supprimer le fichier PDF corrompu.
Si le problème persiste, il faudra remplacer la carte formatter et/ou la Main PCA.
Ce remplacement est complexe car il nécessite un démontage important.Cause :
Un traceur HP DesignJet T770 qui fait une erreur 79:04 est le plus souvent victime d’un fichier corrompu (pdf en général).
Auto-dépannage :
1/ Redémarrez le traceur HP DesignJet T770 en suivant cette procédure :
– Eteignez le traceur HP DesignJet T770
– Débranchez le câble réseau et/ou usb (ne rebranchez pas avant d’avoir terminé les tests)
– Rallumez le traceur HP DesignJet T770
– Imprimez des test internes (à partir du panel du traceur HP DesignJet T770).
Si cela fonctionne, à priori le traceur HP DesignJet T770 n’a pas de panne, mais il est victime d’un PC qui lui envoie un fichier ou une information corrompu.
2/ Supprimez le fichier corrompu.
– Vider les files d’attente de tous les PC.
3/ Rebrancher le câble réseau et/ou usb
4/ Rallumez le traceur HP DesignJet T770
Si le traceur HP DesignJet T770 fait toujours une erreur 79:04, essayez :
– De mettre à jour le firmware du traceur HP DesignJet T770 (appelé aussi microprogramme ou micrologiciel).
– De remplacer les têtes d’impression du traceur HP DesignJet T770Intervention technicien :
Si le problème persiste, il se peut que le traceur HP DesignJet T770 ai une vraie panne matériel, prévoyez une intervention de 2 heures + déplacement + le remplacement de la carte formatter ou Main PCA.
-
86:01
Un traceur HP DesignJet T770 HP Designjet qui affiche un code erreur 86:01 indique que le chariot est bloqué.
+le code erreur 86:01 indique un blocage du chariot.
Vérifiez que le chariot n'est pas bloqué par un morceau de papier, un intrus qui serait tombé dans le traceur HP DesignJet T770 ou une pièce du traceur HP DesignJet T770 qui ne serait pas bien en place.
S'il n'y a rien de suspect, c'est que le chariot du traceur HP DesignJet T770 est cassé (plus précisément la patte qui maintient la courroie sur le chariot)
La réparation de votre traceur HP DesignJet T770 nécessite un démontage important.
Notre technicien en profitera pour faire une révision complète du traceur HP DesignJet T770.Cause :
L’erreur 86:01 peut être causée par un bourrage papier, mais la plupart du temps, sur ce modèle de traceur HP DesignJet T770 le code erreur 86:01 survient quand le chariot du traceur HP DesignJet T770 est HS (plus précisément la patte qui maintient la courroie sur le chariot est cassée). En général ce message est bloquant. Votre traceur HP DesignJet T770 ne fonctionnera à nouveau que quand le problème sera résolu.
Intervention technicien :
Le technicien doit remplacer le chariot, prévoir une intervention de deux heures + déplacement + fourniture de la pièce. Le remplacement du chariot nécessitant le démontage du traceur HP DesignJet T770 le technicien en profite pour faire un nettoyage, graissage et révision complète.
-
Remplacement des têtes non terminé
Ce message indique que le remplacement de la tête a échoué.
+le message "remplacement des têtes non terminé" indique qu'il y a un problème de tête d'impression et que le remplacement a échoué.
Vérifiez que toutes vos cartouches d'encre sont suffisamment pleines et relancer l'opération. Si l'opération échoue à nouveau c'est qu'il y a une panne complexe.Cause :
L'échec du remplacement de la tête d'impression peut être causé par une tête défectueuse même neuve, une cartouche vide ou insuffisamment remplie ou une panne du traceur HP DesignJet T770.
Auto-dépannage :
1/ Vérifier que les cartouches sont des cartouches originales HP et remplies au moins à 30%.
2/ Mettre à jour le Firmware du traceur HP DesignJet T770 (Un traceur HP DesignJet T770 avec un firmware corrompu peut refuser une tête.
3/ Installer une nouvelle tête d'impression.Intervention technicien :
Si toutes les manipulations indiquées n'aboutissent pas c'est que le traceur HP DesignJet T770 est en panne. Prévoir une intervention de 2 à 3 heures + déplacement + fourniture de pièces détachées.

Le code erreur affiché n'est pas dans la liste ?
N'hésitez pas à nous appeler, nous vous guidons par téléphone.
Tous les codes erreur
Traduction française par IA — en cas de doute sur une procédure, vérifiez le texte anglais d'origine (bouton EN).
Aucun résultat — contactez-nous
-
01.0:YZ
+Communication with Engine PCA failed
Solution :
1. Switch the power off from the back of the product and disconnect the power cord. Reconnect the power cord and power on the product. 2. Remove the Formatter and reinsert it again. Ensure that it connects properly in the Engine PCA connector. • Replace the Engine PCA. • Replace the Formatter.
-
01.1:YZ
+Error in the Engine PCA
Solution :
1. Switch the power off from the back of the product and disconnect the power cord. Reconnect the power cord and power on the product. 2. Replace the Engine PCA. 3. Replace the Formatter.
-
01.2:YZ
+Failure communicating with an Ink Supply
Solution :
1. Switch the power off from the back of the product and disconnect the power cord. Reconnect the power cord and power on the product. 2. Perform the Ink Delivery System diagnostic test. – If the test finds that the ink supply is defective, replace it. – If the test does not find any errors, remove all the ink supplies from the ISS and reboot the product. 3. Install the ink cartridges with the product booted in normal mode. Use the replacement option available from the Touch Control Panel and
-
02.1:YZ
+Problem with the Carriage PCA
Solution :
1. Switch the power off from the back of the product and disconnect the power cord. Reconnect the power cord and power on the product. 2. Check that the Trailing Cable is not damaged. Check that the Trailing Cable is correctly connected between the Engine PCA and Carriage PCA. 3. Replace the Carriage PCA. See Carriage PCA. 4. Replace the Trailing Cable and Carriage PCA Covers. 5. Replace the Engine PCA. See EE Box.
-
03:YZ
+Problem with Power Supply Unit
Solution :
1. Switch the power off from the back of the product and disconnect the power cord. Reconnect the power cord and power on the product. 2. Replace the Power Supply Unit (PSU). See Power Supply Unit
-
03.0:10
+Battery of Real Time Clock ran down
Solution :
Replace the battery.
-
06:YZ
+Failure reading/writing NVM in Hard disk
Solution :
1. Switch the power off from the back of the product and disconnect the power cord. Reconnect the power cord and power on the product. 2. Replace the Hard Disk.
-
07:10
+Interconnect Board or Power cable has failed
Solution :
1. Check the condition and connections of the Power Cable, replace if necessary. 2. Replace the Interconnect Board
-
07.01:11
+DelSol3 ASIC not found or not responding
Solution :
1. Check the condition and connections of the Interconnect data and power cable, replace if necessary
-
07.02:11
+USB Cable not connected
Solution :
1. Check the condition and connections of the USB cable, replace if necessary.
-
07.03:10
+USB Hub not found
Solution :
1. Make sure Interconnect board connector labeled 'INPUT HUB' is properly connected. 2. Make sure Wukong board connector labeled JUSB2 is properly connected to the cable coming from Interconnect board. 3. If failure continues, troubleshoot the error by changing the USB cable from Engine PCA to Interconnect, if the error follows to the changed part the USB cable is faulty, if it does not, the part is faulty. 4. Replace the Interconnect PCA, see Interconnect PCA. 5. Replace the Formatter Board
-
07.03:11
+USB Scanner connected to incorrect port
Solution :
Ensure that the USB cable from the Scanner to the Interconnect board is connected at the connection labeled 'SCANNER' and not 'HOST CON'
-
08:01:11
+Touch Control Panel USB Cable fails
Solution :
1. Check the condition and connections of the Touch Control Panel USB cable, replace if necessary. 2. If the error continues, replace the Touch Control Panel Touch Control Panel
-
08:04
+Touch Control Panel communication to the product functions at the initialization, but during normal working the communication is lost.
Solution :
1. Check the event log at the EWS support pages to see if there is another SE (for instance 7:1) and troubleshoot the problem more accurately.Appendix C: Obtaining the product log and the diagnostics package 2. Turn off the product and turn on again, and check to see if the error remains. 3. Upgrade the firmware For more information, see Appendix B: Emergency firmware upgrade with USB flash drive 4. Replace the HDD, see Hard Disk Drive 5. Escalate the issue.
-
08:08
+A feature on the Touch Control Panel hangs or will not function (copy,scan etc)
Solution :
1. Turn off the product and turn on again, and check to see if the error remains. 2. Upgrade the firmware For more information, see Appendix B: Emergency firmware upgrade with USB flash drive 3. Escalate the issue.
-
08:11
+No communication between the product and the Touch Control Panel
Solution :
1. Check the event log at the EWS support pages to see if there is another SE (for instance 7:1) and troubleshoot the problem more accurately.Appendix C: Obtaining the product log and the diagnostics package 2. Check the LED’s on the formatter to see if there is another issue and troubleshoot it more accurately. 3. Turn off the product and turn on again, and check to see if the error remains. 4. Upgrade the firmware 5. Check the condition of the USB cable, check it is not damaged or incorre
-
09:01
+Media jam in Scanner
Solution :
1. Open the CIS to solve the media jam and close it again. 2. If no paper is seen, run Scanner Motor Diagnostic, refer to the Users Guide for further details.
-
09:02
+Scanner not calibrated
Solution :
Calibrate the Scanner
-
09:03
+File I/O Error
Solution :
Reboot Product
-
09:04
+Contex Library failed to load
Solution :
1. Reboot the Product 2. Upgrade the firmware For more information
-
09.01:10
+Scanner Motor is failing
Solution :
1. Perform the Scanner motor diagnostics. 2. Replace the Scanner Motor Scanner Motor Assembly (MFP only)
-
09.02:10
+CIS A Element is failing
Solution :
Replace CIS A Element CIS Element (MFP only)
-
09.03:10
+CIS B Element is failing
Solution :
Replace CIS B Element CIS Element (MFP only)
-
09.04:10
+CIS C Element is failing
Solution :
Replace CIS C Element CIS Element (MFP only)
-
09.05:10
+CIS D Element is failing
Solution :
Replace CIS D Element CIS Element (MFP only)
-
09.06:10
+CIS E Element is failing
Solution :
Replace CIS E Element CIS Element (MFP only)
-
09.08:11
+Power cable of the Scanner is failing
Solution :
Check the condition and connections of the Scanner Power cable, if necessary replace the cable.
-
09.09:11
+USB cable of the Scanner is failing
Solution :
Check the condition and connections of the Scanner USB cable, if necessary replace the cable.
-
09.10:04
+Scanner is in SAFE MODE
Solution :
Restart the product, if the problem persists replace the SCU. See Scanner Controller Board (MFP only).
-
09.10:10
+Scanner SCU is failing
Solution :
Replace the Scanner SCU.See Scanner Controller Board (MFP only).
-
11:YZ
+Trailing Cable does not seem to be detected
Solution :
1. Switch the power off from the back of the product and disconnect the power cord. Reconnect the power cord and power on the product. 2. Check that the Trailing Cable is not damaged; replace it if necessary. Check that the Trailing Cable is correctly connected between the Engine PCA and Carriage PCA. 3. Replace the Carriage PCA. See Carriage PCA. 4. Replace the Engine PCA. See EE Box.
-
21:YZ
+Failure moving Service Station
Solution :
1. Switch the power off from the back of the product and disconnect the power cord. Check the Primer Tubes. Reconnect the power cord and power on the product. 2. Make sure that the Service Station path is clear. Remove any visible obstacles (screws, plastic parts, etc.) restricting the movement of the Service Station. 3. If the carriage has stopped over the service station, on the right side of the product, check that the cutter is not activated. The cutter may be blocking the carriage over t
-
21.1:YZ
+Failure moving the Primer Motor of the Service Station
Solution :
1. Remove the Right Cover and make sure the cables from the Engine PCA to the Service Station are connected and are not damaged. In case of any damage replace the affected cable; see Engine Cables Kit 2. Perform the Primer Motor diagnostic test (listed under the service station diagnostic test) to troubleshoot the problem further. See Primer motor. 3. Replace the Service Station. See Service Station.
-
21.2:YZ
+Failure testing the length of the Service Station path
Solution :
1. Switch the power off from the back of the product and disconnect the power cord. Check the Primer Tubes. Reconnect the power cord and power on the product. 2. Make sure that the Service Station path is clear. Remove any visible obstacles (screws, plastic parts, etc.) restricting the movement of the Service Station. 3. If the carriage has stopped over the service station, on the right side of the product, check that the cutter is not activated. It may happen that the cutter is blocking the
-
22.0:YZ
+Left Ink Supply Station error, module 0.
Solution :
1. Switch the power off from the back of the product and disconnect the power cord. Reconnect the power cord and power on the product. 2. Check that the cables between the Ink Supply Station and the Engine PCA are not damaged and are properly connected. In case of any damage replace the cable. 3. Perform the Ink Delivery System diagnostic test to troubleshoot the problem further. See Ink Delivery System (IDS) Test. 4. Replace the Left Ink Supply Station. See Left Ink Supply Station. 5. Replac
-
22.1:YZ
+Left Ink Supply Station error, module 1
Solution :
1. Switch the power off from the back of the product and disconnect the power cord. Reconnect the power cord and power on the product. 2. Check that the cables between the Ink Supply Station and the Engine PCA are not damaged and are properly connected. In case of any damage replace the cable. NOTE: Check the Data Harness and ISS Harness Cable are connected in the right position onto the Engine PCA. These two connectors can be swapped by mistake causing a SE 22.1:1. Check the instructions in
-
24:YZ
+Ink Setup failure
Solution :
1. Switch the power off from the back of the product and disconnect the power cord. Insert the new purgers, reconnect the power cord and power on the product. 2. Perform the Ink Delivery System diagnostic test in order to check that the bongos (pushers) go up and down to pressurize ink in the tubes and the Out of Ink sensors work properly. See Ink Delivery System (IDS) Test. 3. Try purging the Ink Supply Tubes again once the product has been restarted. 4. If the diagnostic test does not find
-
26:01
+Ink supply error found during IDS diagnostic test. In the Touch Control Panel message you will see letters representing the names of the colors of the faulty supplies.
Solution :
1. Reseat the faulty ink supply and repeat the Ink Delivery System diagnostic test. 2. If the problem persists, replace the faulty ink supply and repeat the Ink Delivery System diagnostic test. 3. If the problem persists, replace the Left Ink Supply Station. See Left Ink Supply Station.
-
39.1:01
+Roll 1 switch failed (standby or resume). Roll 1 has been unloaded.
Solution :
There is no corrective action. This system warning code only notifies the user that the roll has been unloaded because an unexpected error occurred with Roll 1 in standby or resume operation.
-
39.2:01
+Roll 2 switch failed (standby or resume). Roll 2 has been unloaded.
Solution :
There is no corrective action. This system warning code only notifies the user that the roll has been unloaded because an unexpected error occurred with Roll 2 in standby or resume operation.
-
41:YZ
+Electrical fault or current limit in Media-Axis Motor
Solution :
1. Switch the power off from the back of the product and disconnect the power cord. Reconnect the power cord and power on the product. 2. Check for any visible obstacles restricting the movement of the Media Advance Roller. If there is a wrinkled mass of paper inside the paper path, lift the Pinch wheels (using Media Lever) and clear the obstruction. 3. Perform the Paper Drive diagnostic test to troubleshoot the problem furthe. See Paper Drive Test. 4. Perform the Rewinder diagnostic test to
-
42:YZ
+Electrical problem (fault, current limit, overheating) in Scan-Axis Motor
Solution :
1. Switch the power off from the back of the product and disconnect the power cord. Reconnect the power cord and power on the product. 2. Check for any visible obstacles restricting the movement of the Carriage Assembly. Remove any obstacle to let the carriage move freely along the whole scan axis. If there is a wrinkled mass of paper inside the paper path, raise the pinch wheels (using the Media Lever) and clear the obstruction. 3. Check that the Scan-Axis Motor cable is not damaged and is c
-
45.1:YZ
+An error with the Rewinder 1 System (Upper Rewinder) has been detected.
Solution :
1. Switch the power off from the back of the product and disconnect the power cord. Remove the paper from Roll 1. Reconnect the power cord and power on the product. 2. Check that the Rewinder 1 cable is not damaged and is correctly connected to the Engine PCA. 3. Check that the Upper Right Roll Support is correctly attached to and aligned with the Right Cover. 4. Perform the Rewinder diagnostic test to troubleshoot the problem further. See Rewinder Test. 5. Replace the Upper Right Roll Suppor
-
45.2:YZ
+An error with the Rewinder 2 System (Lower Rewinder) has been detected .
Solution :
1. Switch the power off from the back of the product and disconnect the power cord. Remove the paper from Roll 2. Reconnect the power cord and power on the product. 2. Check that the Rewinder 2 cable is not damaged and is correctly connected to the Engine PCA. 3. Check that the Lower Right Roll Support is correctly attached to and aligned with the Right Cover. 4. Perform the Rewinder diagnostic test to troubleshoot the problem further. See Rewinder Test. 5. Replace the Lower Right Roll Suppor
-
47:YZ
+Starwheels motor error
Solution :
1. Switch the power off from the back of the product and disconnect the power cord. Reconnect the power cord and power on the product. 2. Check for any visible obstacles restricting the movement of the Starwheel Assembly, then clear the obstruction. 3. Check that the Starwheel Assembly cable is not damaged and is correctly connected to the Engine PCA. 4. Perform the Scan Axis Starwheel diagnostic test to troubleshoot the problem further. 5. Replace the Starwheel Motor. See Starwheel Motor. 6.
-
48:YZ
+PPS system failure
Solution :
1. Switch the power off from the back of the product and disconnect the power cord. Reconnect the power cord and power on the product. 2. Check that the Pen to Paper Space (PPS) Solenoid cable is not damaged and is correctly connected to the Engine PCA. 3. Perform the Scan Axis PRS diagnostic test to troubleshoot the problem further. 4. Replace the Pen to Paper Space (PPS) Solenoid. See Pen to Paper Space (PPS) Solenoid. 5. Replace the Engine PCA. See EE Box.
-
51:YZ
+Scanner Position Sensor failure
Solution :
1. Check that the Scanner Position Sensor cable is not damaged and is correctly connected to the Engine PCA. 2. Perform the Sensors Test to troubleshoot the problem further. See Sensors Test. 3. Replace the Scanner Position Sensor. See Scanner Position Sensor (MFP only).
-
52:10
+The product has detected a failure in the Drop Detector.
Solution :
1. Switch the power off from the back of the product and disconnect the power cord. Reconnect the power cord and power on the product. 2. Check that the Drop Detector cable is not damaged and is correctly connected to the Engine PCA. 3. Replace the Drop Detector. See Drop Detector. 4. Replace the Engine PCA. See EE Box.
-
55:YZ
+Problem with the Line Sensor. The product has detected a failure to access the Line Sensor EEPROM.
Solution :
1. Switch the power off from the back of the product and disconnect the power cord. Reconnect the power cord and power on the product. 2. Perform the Carriage Test to troubleshoot the problem further. See Carriage Assembly Test. 3. Check the Line Sensor connections to the Carriage PCA. 4. Replace the Line Sensor. See Line Sensor. 5. Replace the Carriage PCA. See Carriage PCA.
-
56:YZ
+Drive roller analog encoder homing (also known as “zero search”) failed.
Solution :
1. Switch the power off from the back of the product and disconnect the power cord. Reconnect the power cord and power on the product. 2. Perform the Media Path Test to troubleshoot the problem further. See Paper Drive Test. 3. Replace the Encoder Disk and Encoder Sensor. See Encoder Disk and Encoder Sensor. 4. Replace the Engine PCA. See EE Box.
-
59.1:09
+Two electrical parts have been replaced at the same time.
Solution :
Replace one part at a time, and restart the product before replacing another.
-
59.2:00
+An unsupported or reused part has been installed.
Solution :
Install only new parts recommended by HP for this product.
-
60.1:YZ, 60.2:YZ
+Initialization error
Solution :
1. Switch the power off from the back of the product, wait two minutes, then switch it back on again. 2. Check the power cord; try connecting it to another power socket. 3. Check that the product is properly connected in all other respects. 4. Switch the power off from the back of the product; remove the Formatter; reinsert the Formatter; switch the power on again. 5. If the error persists, get the product log (see Appendix C: Obtaining the product log and the diagnostics package) and contact
-
61:04.1
+The PostScript fonts seem to be missing.
Solution :
Perform a firmware upgrade to re-install the fonts.
-
61:08.1
+The file cannot be printed because it is password-protected.
Solution :
Resend the file without password protection.
-
61:YZ
+The file format is incorrect or not supported for the current product configuration and the product cannot process the job.
Solution :
1. Check if the product supports the file format (formats such as PS, PDF, TIFF and JPEG are supported by PostScript products only). 2. Switch the power off from the back of the product and disconnect the power cord. Reconnect the power cord and power on the product. 3. Check the graphic language setting of the product (refer to the User's Guide). 4. Resend the file to the product. 5. Check that the product has the latest firmware version. If not, update the firmware to the latest version.
-
63:01
+Cannot retrieve IP addess
Solution :
1. Connect to another network. 2. Modify the IPv4 configuration.
-
63:YZ
+Input/Output problem through the network interface of the Formatter
Solution :
1. Switch the power off from the back of the product and disconnect the power cord. Reconnect the power cord and power on the product. 2. Check that the Network cable is correctly connected to the Formatter. 3. Check that the product has the latest firmware version. If not, update the firmware to the latest version. 4. Replace the Formatter. See Formatter.
-
64:YZ
+Input/Output problem through the USB Port
Solution :
1. Switch the power off from the back of the product and disconnect the power cord. Reconnect the power cord and power on the product. 2. Check that the USB cable is correctly connected to the product. 3. Check that the product has the latest firmware version. If not, update the firmware to the latest version. 4. Replace the Formatter. See Formatter.
-
64.1:YZ
+The External Hard Disk accessory does not seem to be connected
Solution :
1. Switch the power off from the back of the product. Connect the External Hard Disk accessory, check that the USB cable is properly connected and power on the product. If the External Hard Disk accessory is not available (has been lost or broken), proceed with step 2. 2. If the problem persists, power off from the back of the product. Power on the product again while pressing the keys Menu, OK and Cancel keys simultaneously until the Touch Control Panel asks gproduct configured to use Exter
-
65:YZ
+Memory Driver Internal I/O error, I/O Socket Manager Internal I/O error
Solution :
1. Switch the power off from the back of the product and disconnect the power cord. Reconnect the power cord and power on the product. 2. Check that the unknown port cable is correctly connected to the product. 3. Check that the product has the latest firmware version. If not, update the firmware to the latest version. 4. Replace the Formatter. See Formatter. 5. Replace the Engine PCA. See EE Box.
-
68:YZ
+Loss of engine counters tracking
Solution :
The product will continue to function correctly, but the life counters will not continue counting until you restart the product.
-
71:03
+Out of memory
Solution :
Restart the product.
-
71:04
+Out of memory. The total memory available in the product depends on its configuration. It is reported as HPGL/ 2 memory or PS/PDF memory. If the amount of memory that the product needs to process the file is more than the amount available, the product will display this system warning. The amount of memory required for processing the file is known as the edisplay list memoryf: • The display list memory should not be confused with the file size of the print job. The size of the display list
Solution :
1. Upgrade the firmware to the latest version available. 2. Decrease the print resolution to 3 dpi. NOTE: If the customer does not accept the print quality after reducing the resolution or using Econofast print mode, proceed to the workaround in step 3. • The resolution required by the product to process the file is set by the print mode selected (Best, Normal, Fast). There is a setting available that enables you to decrease the resolution for each print mode to 3 dpi. If this setting is
-
72.02:09
+Generic firmware Error
Solution :
1. Switch the power off from the back of the product and disconnect the power cord. Reconnect the power cord and power on the product. 2. Check that the product has the latest firmware version. If not, update the firmware to the latest version Appendix B: Emergency firmware upgrade with USB flash drive NOTE: If you see system error 79:4, see Appendix A: How to troubleshoot SE 79:4. NOTE: A firmware upgrade will not always solve the problem. The best way to solve this problem is to report th
-
72.02:YZ
+A service calibration should be performed.
Solution :
To find out which service calibration to perform, print the calibration status. At the Touch Control Panel, select the Internal Prints icon, then Service information > Print calibration status. Perform whichever calibration is needed.
-
74:YZ
+Error uploading firmware update file
Solution :
1. Switch the power off from the back of the product and disconnect the power cord. Reconnect the power cord and power on the product. 2. Make sure the connection between the computer and the product is functioning properly. 3. Try to update the firmware again.
-
74.08:04
+Problem with the firmware upgrade process
Solution :
1. Reboot the Product 2. Try to upgrade the firmware again, for more information, see Appendix B: Emergency firmware upgrade with USB flash drive 3. Download again the firmware file from the source, as the original may be corrupted. 4. Replace the Touch Control Panel
-
74.1:YZ
+Error uploading paper profile update file
Solution :
1. Switch the power off from the back of the product and disconnect the power cord. Reconnect the power cord and power on the product. 2. Make sure the connection between the computer and the product is functioning properly. 3. Try to upload the paper profile update file again. 4. Make sure the version of the paper profile update file is compatible with the firmware version the product is using. You can check this on the same Web page where you downloaded the paper profile update.
-
75.21:YZ
+The spittoons (Left Spittoon, Service Station) have reached 80% capacity.
Solution :
Use Preventive Maintenance Kit #2 to replace the Left Spittoon and Service Station.
-
75.22:YZ
+The spittoons (Left Spittoon, Service Station) are full.
Solution :
Use Preventive Maintenance Kit #2 to replace the Left Spittoon and Service Station.
-
76:YZ
+Hard disk drive is full.
Solution :
Remove any unnecessary files from the hard disk using the Embedded Web Server. If the problem persists, run the Hard Disk Recovery Utility (see Hard Disk Recovery Utility).
-
78:08
+The job received cannot be printed without borders on this paper.
Solution :
Use a paper that supports borderless printing. NOTE: This system error code does not require service help. It should be resolved by the customer.
-
78.1:YZ
+Media settings area missing in paper settings file
Solution :
1. Switch the power off from the back of the product and disconnect the power cord. Reconnect the power cord and power on the product. 2. Check that the product has the latest firmware version. If not, update the firmware to the latest version.
-
79:YZ
+Generic firmware error
Solution :
1. Switch the power off from the back of the product and disconnect the power cord. Reconnect the power cord and power on the product. 2. Check that the product has the latest firmware version. If not, update the firmware to the latest version. NOTE: If you see system error 79:4, see Appendix A: How to troubleshoot SE 79:4. NOTE: A firmware upgrade will not always solve the problem. The best way to solve this problem is to report the error to HP correctly. Make sure that you supply all the
-
81:01
+Paper axis error—the copier will restart and run a diagnostic test
Solution :
None
-
81:YZ
+Problem with paper advance. This source of error could come from an error in any of the following systems: paper motor, disk encoder, cables or main electronics.
Solution :
This error can occur because the product has been dropped during transportation, causing structural damage. Before continuing with the 81:YZ troubleshooting, first look for structural damage. To identify the structural damage, look for the following three things: • Consistent 81:YZ error codes. • Platen fingers rubbing on the roller surface, leaving black marks on the roller. • A gap on the platen beam. If therefs any gap in Z (vertical direction) between the plastic feature of the platen
-
86:01
+Scan axis error—the copier will restart and run a diagnostic test
Solution :
None
-
86:11
+Scan Axis movement requires too much force or energy.
Solution :
1. Check that the cutter disengages correctly. 2. Lubricate the scan axis. 3. Use Preventive Maintenance Kit 1.
-
87:YZ
+Problem with the Carriage Encoder Sensor readings
Solution :
1. Check that the encoder sensor is correctly connected to the Carriage PCA. 2. Make sure the Encoder Strip is not broken or damaged. If necessary, replace it. See Encoder Strip, spring and attachment nut. 3. Make sure that the Encoder Strip is clean. If it is dirty, clean it, paying special attention to the area near the Service Station. See Cleaning the Encoder Strip. 4. Clean the Encoder Sensor. 5. Replace the Encoder Sensor. 6. Replace the Carriage PCA. See Carriage PCA. 7. Replace the Tr
-
87.01
+Problem finding the Scan-axis encoder reading
Solution :
1. Switch the power off from the back of the product and disconnect the power cord. Reconnect the power cord and power on the product. 2. Make sure that the encoder strip is clean. If the encoder strip is dirty, clean it, paying special attention to the area near the Service Station. See Cleaning the Encoder Strip. 3. Clean the encoder sensor. 4. Replace the Encoder Sensor.
-
93:YZ
+Unable to pressurize the Ink Delivery System
Solution :
1. Switch the power off from the back of the product and disconnect the power cord. Reconnect the power cord and power on the product. 2. Perform the Ink Delivery System diagnostic test to further troubleshoot the problem. See Ink Delivery System (IDS) Test. 3. Check that the cables between the Ink Supply Station and the Engine PCA are not damaged and are properly connected. In case of any damage replace the cable. 4. Replace the Left Ink Supply Station, depending on the results of the diagno
-
XX.n:YZ.m
+Error Codes Format: • XX: Subsystem or process (2 digits). • n: Subsystem or process index (if more than one used in the product) – optional. e.g. Identify the Ink Supply (color and number). • Y: Who should perform the action (1 digit) – (0 for User or 1 for Service Engineer). • Z: Action to perform (1 digit). • m: additional actions/information to consider (1 digit) – Optional.
Solution :
Error Codes Format
Problèmes fréquents
Cliquez sur + pour voir l'explication et les solutions
-
Bruit côté gauche
Si votre traceur HP DesignJet T770 fait du bruit du côté gauche (quand est face à lui) c'est que l'alimentation du traceur HP DesignJet T770 est HS.
+HP DesignJet T770 qui fait du bruit du côté gauche a le bloc d'alimentation HS.
Son remplacement est complexe car il nécessite un démontage important.Cause :
Le bloc d'alimentation du traceur HP DesignJet T770 ou un élément du bloc d'alimentation est HS.
Souvent ce bruit est aléatoire au début mais il finit par augmenter et par devenir permanent.
Ce bruit est souvent suivi (ou précédé) d'une erreur 03:10, rendant alors le traceur HP DesignJet T770 inutilisable.
Il faut alors faire intervenir un technicien pour remplacer la pièce défectueuse.
Dès la première apparition de ce bruit, faites-nous intervenir pour éviter un problème qui tôt ou tard bloquera votre traceur HP DesignJet T770 et votre production.Intervention technicien :
Le remplacement de du bloc alimentation du traceur HP DesignJet T770 nécessite une intervention de 2 heures + déplacement + remplacement de la pièce défectueuse.
-
Se bloque au démarrage
Un traceur HP DesignJet T770 qui bloque au démarrage a généralement un problème de carte mère (Carte formatter ou Main PCA ou electronic module)
+HP DesignJet T770 qui bloque au démarrage a la carte formatter ou la Main PCA HS.
Son remplacement est complexe car il nécessite un démontage important.Cause :
La carte formatter ou la Main PCA est HS, il va falloir la remplacer.
Intervention technicien :
Le remplacement de la carte nécessite l'intervention d'un technicien.
Prévoir 1 à 3 heures d'intervention + déplacement + le prix de la pièce. -
Alimenté mais ne démarre pas
Un traceur HP DesignJet T770 qui ne démarre pas a généralement un problème de carte mère (Carte formatter ou Main PCA ou electronic module).
+HP DesignJet T770 qui s'allume mais ne démarre pas a la carte formatter ou la Main PCA HS.
Son remplacement est complexe car il nécessite un démontage important.Cause :
La carte formatter ou la Main PCA est HS, il va falloir la remplacer.
Intervention technicien :
Le remplacement de la carte nécessite l'intervention d'un technicien.
Prévoir 1 à 3 heures d'intervention + déplacement + le prix de la pièce. -
L'écran reste blanc
Un traceur HP DesignJet T770 dont l'écran reste blanc (éclairé mais sans aucune inscription) a un problème de carte mère (carte formatter ou Main PCA).
+HP DesignJet T770 qui s'allume avec un écran blanc à la carte formatter ou la Main PCA HS.
Son remplacement est complexe car il nécessite un démontage important.Cause :
La carte formmater ou la Main PCA est HS, il faut la remplacer.
Intervention technicien :
1/ Identifier précisément la pièce à remplacer à l'aide des 3 voyant qui se trouvent à côté de la prise réseau.
2/ Faire intervenir un technicien pour remplacer la pièce défectueuse, prévoir 1 à 3 heures de main d'oeuvre + déplacement + la fourniture de la pièce. -
Le traceur HP DesignJet T770 ne répond pas aux ordres du PC
Le traceur HP DesignJet T770 est allumé, affiche prêt, mais ne réagit pas.
+HP DesignJet T770 qui démarre correctement mais ne répond pas aux ordres du PC a un problème de communication.
Le problème peut avoir plusieurs origines : Adresse IP mal paramétrée, mauvais pilote d'impression, câble HS...
La recherche du "coupable" peut être compliquée.Cause :
Les causes possibles sont :
- Le câble réseau est HS ou déconnecté.
- Il y a un problème d'adresse IP : Conflit d'adresse, adresse changée, box inaccessible...
- Le pilote est corrompu ou pas compatible.Auto-dépannage :
Vérifiez la connexion physique du réseau (les câbles, la box, le switch...)
Vérifiez l'adresse IP du traceur HP DesignJet T770 (changement d'adresse, absence de conflit...)
Vérifiez le pilote d'impression
Si tout est en ordre il se peut que la carte réseau du traceur HP DesignJet T770 soit HS.Intervention technicien :
Pour une interventions sur site prévoir 1 à 3 heures pour faire tous les tests étape par étape et identifier l'origine du problème + déplacement + fourniture éventuelle d'une carte réseau.
-
Pas d'alimentation électrique
Un traceur HP DesignJet T770 qui ne présente aucune trace d'alimentation électrique a probablement le bloc alimentation HS.
+HP DesignJet T770 qui n'est plus du tout alimenté a le bloc d'alimentation HS.
Son remplacement est complexe car il nécessite un démontage important.Cause :
Le bloc d'alimentation est HS, il va falloir le remplacer.
Intervention technicien :
Le remplacement du bloc d'alimentation nécessite l'intervention d'un technicien.
Prévoir 1 à 2 heures d'intervention + déplacement + le prix de la pièce. -
Problème de qualité d'impression
Votre traceur HP DesignJet T770 a une mauvaise qualité d'impression.
+HP DesignJet T770 qui a un problème de qualité d'impression (couleurs non conformes, couleurs non homogènes, traits mal formés, bavures, impressions vierge ou incomplètes...) a des têtes d'impression en mauvais état.
Vous pouvez essayer de lancer une procédure de nettoyage des têtes d'impression. Si la procédure ne résout pas le problème, c'est qu'il faut remplacer les têtes. Vous pouvez nous les commander et essayer de les remplacer par vous même.
En cas de doute, faites nous intervenir, notre technicien en profitera pour faire une révision du traceur HP DesignJet T770.Cause :
Il y a de fortes chances pour les têtes d'impression de votre traceur HP DesignJet T770 soient usées.
La majorité des problèmes de qualité d'impression (couleurs non conformes, couleurs non homogènes, traits mal formés, bavures, impressions vierge ou incomplètes...) sont causés par des têtes d'impression usées ou HS .Auto-dépannage :
Commencez par remplacer les têtes d’impression de votre traceur HP DesignJet T770.
Contrairement aux cartouches, les têtes d’impression de votre traceur HP DesignJet T770 ne sont pas pleines ou vides.
Elles s’usent au four et à mesure de leur utilisation et de leur âge.
Selon l’intensité et l’usage du traceur HP DesignJet T770, un jeu de têtes aura une espérance de vie de plusieurs mois à plusieurs années.
Le traceur HP DesignJet T770 mémorise l’usage des têtes d’impressions. Il arrive qu’un traceur HP DesignJet T770 propose ou exige le remplacement de têtes trop usées ou en mauvais état.
Il arrive aussi que les têtes d’impression soient usées et provoquent de mauvaises impressions sans que le traceur HP DesignJet T770 ne signale quoi que ce soit.
Si c’est le cas, n’hésitez pas à remplacer vos têtes d’impression.
Attention, le remplacement des têtes d'impression nécessite d'avoir des cartouches suffisamment pleines.Intervention technicien :
Si vous ne souhaitez pas remplacer les têtes par vous-même, nous pouvons intervenir pour les remplacer, prévoir 1 heure de main d'oeuvre + déplacement + fournitures des têtes neuves + fourniture éventuelle de cartouches neuves (nécessaires au remplacement des têtes d'impression).
Si le remplacement des têtes d'impression est impossible ou si le problème n'est pas résolu, c'est que le problème est plus complexe, prévoir alors une intervention de 1 heure à 3 heures + déplacement fourniture éventuelle de pièces détachées (station service, inktube, chariot...) -
Le traceur HP DesignJet T770 bloque à 94%
Un traceur HP DesignJet T770 qui bloque à 94% est souvent un traceur HP DesignJet T770 qui a des têtes d'impression défectueuses.
+HP DesignJet T770 qui bloque à 94% peut avoir des têtes d'impression HS ou trop usées.
Le traceur HP DesignJet T770 étant en panne, le remplacement est complexe car il nécessite un démontage important.Cause :
Une ou plusieurs têtes d'impression son HS. Il faut les remplacer.
Intervention technicien :
Le remplacement des têtes d'impression quand le traceur HP DesignJet T770 n'est pas sur prêt nécessite l'intervention d'un technicien.
Prévoir 1 heure d'intervention + déplacement + la fourniture des têtes d'impression.
Nomenclature des pièces détachées
Aucune pièce trouvée — contactez-nous
- Q6683-60188 T1100/610 Left Ink Supply Station SV
- CH538-67040 T1200/T770 Service Station SV
- CH538-67078 (G)T1200/T770 HDD w/FW
- Q6675-60093 3- Adaptor kit - Troja Service
- C6980A 3PO HP COATED PAPER 300FT 36W
- CQ533-60002 America Power Cord SV KIT
- Q5669-60155 Anti-ESD Media Output Assy 24 SV
- Q6659-60089 Anti-ESD Media Output Assy 44 SV
- CQ533-60003 Asia Power Cord SV KIT
- CR647-67010 Bender Power Supply
- Q6659-60237 Bin Assembly 44 SV
- Q5669-60687 Carriage Bushing Sv
- 5090-3379 CLOTH, TONER CLEANING
- CN727-67023 CUTTER ASSY W/ SCREW
- Q6683-67028 DJ Z and T-Series Tool Kit SV
- Q5669-60666 Drop Detector Assy Sv
- Q5669-60702 Encoder Disk Sv
- CQ533-60001 Europe Power Cord SV KIT
- Q5669-60690 Flex contacts cleaning Toll Sv
- Q6712-69001 Foot service, Part Q6712-69001 is no longer supplied. Please order the replacement, CH539-69001
- CH539-69001 Foot Svs Black 2 pcs
- Q5669-60730 HARDWARE KIT TROJA SERVICE
- C6020B HP Coated 36inx150ft Paper
- Q1956A HP Coated Paper 42- x 225 ft
- Q8834A HP Gloss Polypropylene 36inX75ft
- C6810A HP LF Bright White Inkjet 300 ft. 91.5m
- C1860A HP LF Bright White Inkjet Paper 24- Roll
- C1861A HP LF Bright White Inkjet Paper 36- Roll
- C3875A HP LF Clear Film (36- x 75 ft) Roll
- C6019B HP LF Coated Paper 24-x150 ft 98 gsm
- C6030C HP LF Heavyweight Coated Paper, 36-
- C6569C HP LF Heavyweight Coated Paper, 42-
- C3868A HP LF Natural Tracing Paper, 36-x150 ft
- 51642B HP LF Polyester Film, 36- Roll
- Q6627A HP Matte Super Hw Plus Paper 36inX100ft
- Q6628A HP Matte Super Hw Plus Paper 42inX100ft
- CG459A HP Prem Matte Photo 210 g/m 24inX100ft
- CG460A HP Prem Matte Photo 210 g/m 36inX100ft
- Q6675-60109 Left Front Trim SV
- Q6677-67006 Left Roll Guide SVC
- Q5669-67049 Left Spittoon Rev B SV
- Q5669-60716 Leg Assy Sv
- Q5669-60718 Leg Cover Assy Sv
- C7960A LF Backlit Reverse Print 36- x 75 ft
- Q1397A LF Bond 36- x 150 ft
- Q1445A LF Bright White A1 Metric 23.39- x150ft
- C6035A LF Bright White Inkjet 610mm x 45 7m
- C6036A LF Bright White Inkjet 914mm x 45,7m
- Q1442A LF Coated Paper A1 Metric 23.39- x150 f
- Q1427A LF High Gloss Photo Paper 36- x 100 f
- Q1421A LF Semi-Gloss Photo Paper 36- x 100 f
- CH538-67073 Media axis encoder disk SV
- Q6675-67018 MEDIA DRIVER TOOL KIT
- Q5669-67801 Media Sensor SV, Part Q5669-67801 is no longer supplied. Please order the replacement, Q5669-67068
- Q5669-67068 Media Sensor SVC
- CR647-67023 MSG signed Analog Encoder PCA SV
- CR647-67024 MSG signed Line Sensor SV
- CH538-67074 New center support SV
- Q6675-60042 Overdrive 24 Assy SV
- Q6677-60018 Overdrive 44 Assy SV
- Q6687-60093 Paper Advance Calibration T Series 44
- Q6687-60084 Pinch Insertion Tool SV
- Q6687-60085 Pinchwheel Assy SV
- Q5669-60705 Pinchwheel lifter assy Sv
- Q5669-60706 Pinchwheel lifter sensor Sv
- Q5669-67807 PRS Actuator Sv
- Q6675-67005 Purgers (100 units) SV
- Q6675-67004 Purgers (6 units) SV
- Q6675-60043 Rail Oiler Assy SV
- Q6675-67026 Right Roll Guide SVC
- Q6677-60019 Roll Guide Assy Left SV
- Q6675-60044 Roll Guide Assy Right SV, Part Q6675-60044 is no longer supplied. Please order the replacement, Q6675-67026
- CH538-67076 Scan Axis Motor Poly-V SV
- CH538-60141 Scan Axis Motor Poly-V SV, Part CH538-60141 is no longer supplied. Please order the replacement, CH538-67076
- 0624-0769 SCREW-TPG 6-19 .5-IN-LG PAN-HD-TRX T15
- Q6675-67017 SPANNER KIT
- Q5669-67054 Starwheel Support Assembly SV
- CH538-67054 Support Label CH538-80023 nameplate SV
- CH539-67019 Support Label CH539-80001 nameplate SV
- CH539-67020 Support Label CK834-80001nameplate SV
- CH538-67053 Support Label CN375-80001 nameplate SV
- Q6687-60064 T1100/610 Front Cover 44 SV
- Q6683-67004 T1100/610 Line Sensor SV, Part Q6683-67004 is no longer supplied. Please order the replacement, CR647-67024
- Q6687-67001 T1100/610 Spindle 44 SV
- Q6683-67001 T1100/610 Tool Kit, Part Q6683-67001 is no longer supplied. Please order the replacement, Q6683-67028
- CK837-67002 T1120/620 Carriage Cover SV
- CK837-67001 T1120/620 Carriage Latch SV
- CK837-67028 T1120/620 Carriage PCA Covers SV
- CK837-67003 T1120/620 Carriage PCA Covers SV, Part CK837-67003 is no longer supplied. Please order the replacement, CK837-67028
- CK837-67005 T1120/620 Carriage PCA SV
- CK837-67020 T1120/620 Encoder Sensor SV, Part CK837-67020 is no longer supplied. Please order the replacement, CR647-67023
- CK839-67005 T1120/620 Encoder Strip Spring 44 Rev
- CK837-67006 T1120/620 Front Panel SV
- CH538-67006 T1200 Cables Kit SV
- CH538-67022 T1200 Converger Assy
- CH538-67032 T1200 Front Panel SV
- CH538-67013 T1200 Left Cover w/ink door SV
- CH538-67017 T1200 Left Ink Cartridge Door SV
- CH538-67005 T1200 Left Side Panel SV
- CH538-67016 T1200 Lower Left Support
- CH538-67029 T1200 Lower Right Support SV
- CH538-67002 T1200 Lower Roll Cover Assy (w/ pinches
- CH538-67037 T1200 Pinch arm assy for roll cover SV
- CH538-67014 T1200 Right Cover SV
- CH538-67047 T1200 Roll Cover bi-stable springs Left
- CH538-67052 T1200 Roll Cover Lower Bumper Left Right
- CH538-67041 T1200 Roll Cover Sensor w/cable SV
- CH538-67026 T1200 Top Cover SV
- CH538-67015 T1200 Upper Left Support SV
- CH538-67003 T1200 Upper Roll Cover Assy (w/ picnhes
- CH538-67065 T1200 Upper Roll Cover Sensor w/cable SV
- CH538-67030 T1200 Window 44 SV
- CH538-67020 T1200/ T770 Serial_Label SV
- CH538-67050 T1200/T700 Roll Cover free wheel SV
- CH538-67024 T1200/T770 44-in PM Kit SV #1, Part CH538-67024 is no longer supplied. Please order the replacement, CR649-67003
- CR649-67003 T1200/T770 44-in PM Kit SV w/ MOD TC
- CH538-67012 T1200/T770 Back Cover SV
- CH538-67018 T1200/T770 Belt 44 SV
- CH538-67064 T1200/T770 BUMP CUTTER ACTUATOR GT SV
- CH538-67044 T1200/T770 Carriage w/ Cutter Assy Sv, Part CH538-67044 is no longer supplied. Please order the replacement, CR647-67025
- CH538-67039 T1200/T770 Clean Out 44 new rev SV
- CH538-67019 T1200/T770 Cutter Assy w/ screw SV, Part CH538-67019 is no longer supplied. Please order the replacement, CN727-67023
- CH538-67004 T1200/T770 Formatter w/o HDD SV
- CH538-67009 T1200/T770 Main PCA w/PSU SV
- CH538-67027 T1200/T770 Media Advance Transmission
- CH538-67011 T1200/T770 Power Supply SV, Part CH538-67011 is no longer supplied. Please order the replacement, CR647-67010
- CH538-67045 T1200/T770 Right Ink Cartridge Door SV
- CH538-67051 T1200/T770 Roll Cover Upper Bumper Left
- CH538-67010 T1200/T770 Scan Axis Motor SV, Part CH538-67010 is no longer supplied. Please order the replacement, CH538-67076
- CH538-67033 T1200/T770 Single Sheet Sensor SV
- CR649-67004 T1200/T770 Tube system 44 assy w/MOD TC
- CH538-67025 T1200/T770 Tube system 44 assy with trai, Part CH538-67025 is no longer supplied. Please order the replacement, CR649-67004
- CH538-67028 T1200/T770 Upper Right Support SV
- CH538-67046 T1200/T770 Wall spacers roll cover bum
- CH538-67075 T1200/T770/T770-24 SATA HDD w/FW SV, Part CH538-67075 is no longer supplied. Please order the replacement, CH538-67078
- CR647-67025 T1300/T790 Carriage w-Cutter SV
- Q6712-60001 T610 Window 44 SV
- CH639-69002 T770 Bin Assembly SV
- CH539-67003 T770 Cables Kit SV
- CH539-67010 T770 Converger CR Assy SV
- CH539-67005 T770 Left Cover SV
- CH539-67008 T770 Left Ink Cartridge Door SV
- CH539-67002 T770 Left Side Panel SV
- CH639-69001 T770 New Foot Assembly SV, Part CH639-69001 is no longer supplied. Please order the replacement, CH539-69001
- CH539-67006 T770 Right Cover SV
- CH539-67011 T770 Top Cover SV
- CH539-67007 T770 Upper Left Support w/o Sensor SV
- CH539-67009 T770 Upper Roll Cover Assy Basic SV
- Q5669-60692 Troja Lubrification Kit Sv
- CK837-67025 Window Position Sensor w Shield SV, Part CK837-67025 is no longer supplied. Please order the replacement, CH538-67071
- CH538-67071 WINDOW SENSOR W SHIELD SV
- Q6659-60236 X-Brace Assembly 44 SV
- Q6718-67017 Z3200 Starwheel Motor SV
Pilote d'impression
Télécharger →Utilitaire PDF
Télécharger →Firmware
Télécharger →Fiche technique
Télécharger →Besoin d'assistance ? Nous pouvons prendre la main à distance.
Télécharger TeamViewerNous contacter
Votre HP DesignJet T770 est en panne ?
Appelez directement notre expert ou remplissez le formulaire de contact. Pas de serveur vocal, pas d'attente.
Nous vous répondons en général en moins de 2 heures.
- 04 78 01 03 24
- info@traceur-lyon.fr
- 23 bis rue Victor et Roger Thomas
69008 Lyon
Devis sous 2h
Demandez votre devis HP DesignJet T770
Décrivez votre panne (code erreur affiché, symptôme constaté). Nous vous rappelons sous 2 h avec un devis personnalisé.
- Diagnostic gratuit par téléphone
- Réponse sous 2 heures
- Intervention sur site en 48 h en Rhône-Alpes
- Pièces du T770 en stock à Lyon
- Dépannages garantis 1 an sur site