
Prise en charge intégrale
Dépannage et réparation HP DesignJet 4000, 4020, 4500 et 4520
à Lyon et en Rhône-Alpes
Consultez-nous !
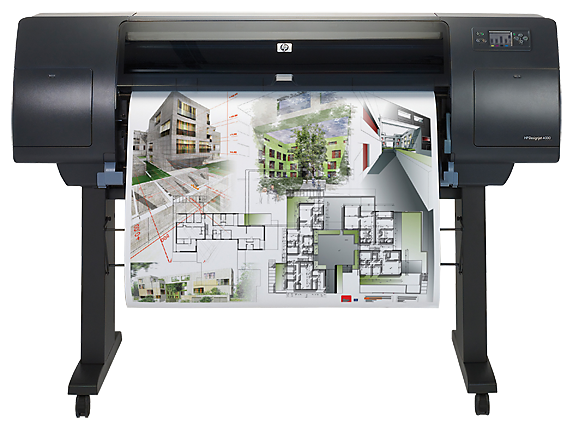
Spécialistes HP DesignJet depuis 1994.
Nous prenons en charge votre HP DesignJet 4000, 4020, 4500 et 4520 de A à Z.
30 années d'expertise
Spécialiste HP DesignJet depuis 1994
Un technicien, pas un standard
Vous parlez directement à un expert
Devis en 2 heures
Intervention sur site en 48 h
Rhône-Alpes
Lyon, Grenoble, Annecy, Chambéry…
VOTRE TRACEUR 4000, 4020, 4500 et 4520 EST EN PANNE ?
Dépannage et réparation du HP DesignJet 4000, 4020, 4500 et 4520 sur site
Basés à Lyon, nous sommes idéalement situés pour dépanner et réparer votre HP DesignJet 4000, 4020, 4500 et 4520 dans toute la région Rhône-Alpes.
Avec plus de 30 années d'expérience, nous dépannons et réparons tous les modèles HP DesignJet, des versions les plus anciennes aux dernières générations.
Chez nous, les modèles que d'autres services déclarent obsolètes ou irréparables restent réparables encore longtemps. Et si la réparation échoue, l'intervention ne vous est pas facturée.
Ce que comprend notre intervention sur votre HP DesignJet 4000, 4020, 4500 et 4520
- Diagnostic gratuit par téléphone
- Devis de dépannage précis en 2 heures
- Dépannage en Rhône-Alpes en 48 heures
- Réparation de toutes les pannes
- Tarifs raisonnables et transparents
- Toutes les pièces détachées en stock
- Toutes nos interventions garanties 1 an sur site
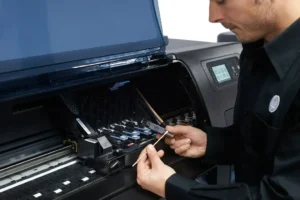
Chaque dépannage réalisé sur votre HP DesignJet 4000, 4020, 4500 et 4520 est couvert par une garantie 1 an sur site : si la panne réparée se reproduit dans l'année, nous revenons chez vous sans frais, pièce et main-d'œuvre comprises.
Remplacement de la courroie + révision complète : À partir de 360 € HT
Votre traceur HP DesignJet 4000, 4020, 4500 et 4520 affiche un code erreur 86:01 ou la courroie est déchirée ?
Notre technicien intervient sur site pour remplacer la courroie dans les règles de l'art. Le remplacement inclut le nettoyage interne complet du traceur — pas question de poser une courroie neuve dans un appareil encrassé.
Une fois la courroie remplacée, notre technicien teste la qualité d'impression, nettoie les têtes d'impression et optimise les réglages. Au départ du technicien, votre HP DesignJet 4000, 4020, 4500 et 4520 aura droit à une seconde jeunesse.
Avant d'engager une réparation lourde, il vaut la peine de se demander si elle en vaut encore la peine : notre page réparer ou remplacer son traceur donne les cinq critères que nous passons en revue au téléphone. Et si le remplacement s'impose, nous rachetons votre HP DesignJet 4000, 4020, 4500 et 4520, en état de marche ou non.
VOUS AVEZ BESOIN DE CARTOUCHES D'ENCRE ?
Nous avons en stock toutes les cartouches pour HP DesignJet 4000, 4020, 4500 et 4520
- Stock important et permanent
- Livraison en 24h à Lyon — 48h France entière
- Cartouches originales HP uniquement
- Têtes d'impression également disponibles
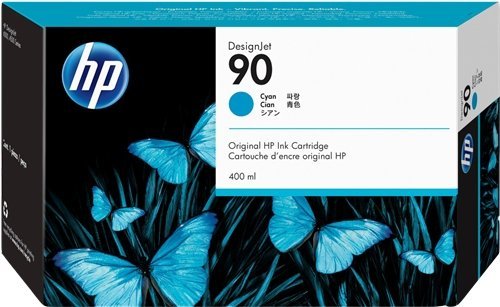
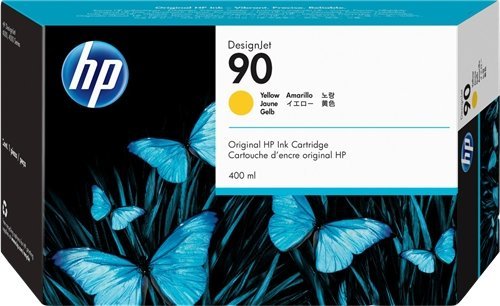
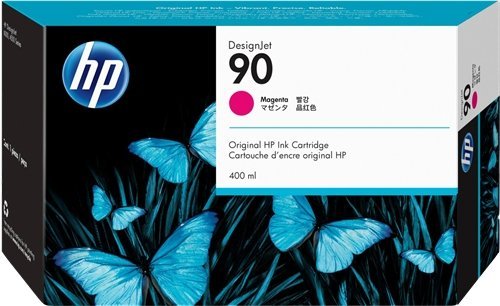
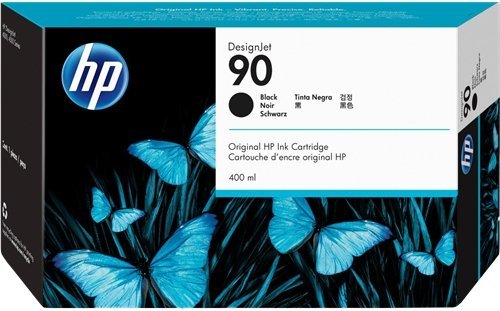
Faites défiler dans le cadre pour voir toutes les cartouches correspondant à votre modèle.
RESSOURCES TECHNIQUES
Tout ce dont vous avez besoin sur le HP DesignJet 4000, 4020, 4500 et 4520
Toutes nos ressources et nos 30 années d'expérience à votre disposition.
Pilotes d'impression, utilitaire d'impression PDF, codes erreur, pannes fréquentes, nomenclature des pièces détachées
Codes erreur fréquents
Chaque code renvoie à une pièce défectueuse précise — cliquez sur + pour l'explication complète
-
86:01 ou Vérifier chemin des têtes d'impression ou Vérifier chemin papier
Un traceur HP DesignJet 4000, 4020, 4500 et 4520 HP Designjet qui affiche un code erreur 86:01 indique que le chariot est bloqué.
+le code erreur 86:01 indique généralement que la courroie est HS.
Son remplacement est complexe car il nécessite un démontage important.
Notre technicien en profite pour faire une révision générale du traceur HP DesignJet 4000, 4020, 4500 et 4520 (nettoyage, graissage, optimisation de la qualité d'impression...)Cause :
L’erreur 86:01 peut être causée par un bourrage papier causé par un intrus (morceau de papier...), mais la plupart du temps, le code erreur 86:01 survient quand la courroie du traceur HP DesignJet 4000, 4020, 4500 et 4520 est HS (usée, déchirée...). En général ce message est bloquant. HP prévient le remplacement de la courroie tous les 5 ans. Votre traceur HP DesignJet 4000, 4020, 4500 et 4520 ne fonctionnera à nouveau que quand le problème sera résolu ou que quand la courroie du traceur HP DesignJet 4000, 4020, 4500 et 4520 sera remplacée.
Intervention technicien :
Le remplacement de la courroie de traceur HP DesignJet 4000, 4020, 4500 et 4520 fait partie des interventions les plus courantes sur les traceurs HP Designjet. Chez Traceur HP DesignJet 4000, 4020, 4500 et 4520 Lyon le technicien en profite pour faire une révision complète du traceur HP DesignJet 4000, 4020, 4500 et 4520 : Nettoyage, graissage, contrôle général, contrôle de la qualité d’impression… Remplacer une courroie de traceur HP DesignJet 4000, 4020, 4500 et 4520 est une intervention très minutieuse. Une courroie de traceur HP DesignJet 4000, 4020, 4500 et 4520 remplacée par un technicien non spécialiste pourra engendrer un code erreur et la panne complète du traceur HP DesignJet 4000, 4020, 4500 et 4520. La remise en état conséquente à une mauvaise intervention pouvant s’avérer bien plus complexe et plus couteuse que le simple remplacement de la courroie. En général prévoir une intervention de 2 heures + déplacement + fourniture de la courroie.
-
05.1:10
Un traceur HP DesignJet 4000, 4020, 4500 et 4520 qui affiche un code erreur 05.1:10 indique que le ventilateur du processeur est HS.
+le code erreur 05.1:10 indique qu'un ventilateur est HS.
Son remplacement est complexe car il nécessite un démontage important.Cause :
Ce problème peut être aléatoire au début et devenir permanent et bloquant ensuite.
Contactez-nous dès la première apparition du message.Intervention technicien :
Le remplacement du ventilateur nécessite 1 à 2 heures de main d'oeuvre + déplacement + la fourniture de la pièce.

Le code erreur affiché n'est pas dans la liste ?
N'hésitez pas à nous appeler, nous vous guidons par téléphone.
Tous les codes erreur
Traduction française par IA — en cas de doute sur une procédure, vérifiez le texte anglais d'origine (bouton EN).
Aucun résultat — contactez-nous
-
01.0:03
+Error impact I2C channel.
Solution :
• Switch the Power OFF from the back of the Printer and disconnect the Power cord. Reconnect the power cord and power On the Printer. • If the System Error continues, replace the Gamut PCI PCA.
-
01.0:10
+Problem with the Gamut PCI PCA.
Solution :
• Switch the Power OFF from the back of the Printer and disconnect the Power cord. Reconnect the power cord and power On the Printer. • Replace the Gamut PCI PCA. • If the System Error continues, replace the Main PCA. Only replace one component at a time and check if the error has gone before replacing another component. Using this procedure you will be able to determine exactly which component failed.
-
01.1:10
+Problem with the PrintMech PCA.
Solution :
• Switch the Power OFF from the back of the Printer and disconnect the Power cord. Reconnect the power cord and power On the Printer. • Check that the cables between the PrintMech PCA and the Gamut PCI PCA are not damaged and are correctly connected. • Replace the PrintMech PCA. • If the System Error continues, replace the Gamut PCI PCA. Only replace one component at a time and check if the error has gone before replacing another component. Using this procedure you will be able to determine e
-
01.2:10
+ISS PCA faulty - Humidity sensor out of scale or NVM backup failure.
Solution :
• Switch the Power OFF from the back of the Printer and disconnect the Power cord. Reconnect the power cord and power On the Printer. • If the System Error continues, replace the Ink Supply Tubes and Trailing Cable.
-
02:10
+Encoder seems to be wrong.
Solution :
• Check that the Carriage Stopper is correctly installed (Refer to Carriage Disassembly Instructions, Step 16.). • Replace the Carriage Assembly. • If the System Error continues, replace the Encoder Strip and Encoder Sensor. Only replace one component at a time and check if the error has gone before replacing another component. Using this procedure you will be able to determine exactly which component failed.
-
02.1:10
+Problem with the Carriage PCA.
Solution :
• Switch the Power OFF from the back of the Printer and disconnect the Power cord. Reconnect the power cord and power On the Printer. • Check that the Trailing Cable is not damaged. • Check that the Trailing Cable is correctly connected to the Carriage PCA, Interconnect PCA and to the Gamut PCI PCA. • Replace the Carriage PCA. • If the System Error continues, replace the Gamut PCI PCA. Only replace one component at a time and check if the error has gone before replacing another component. Usi
-
03:10
+Problem with the Power Supply Unit.
Solution :
• Switch the Power OFF from the back of the Printer and disconnect the Power cord. Reconnect the power cord and power On the Printer. • Perform the Electronics Modules Test to troubleshoot the problem further. • If the System Error continues, replace the Power Supply Unit.
-
05.1:10
+CPU Fan is stopped or burnt.
Solution :
• Switch the Power OFF from the back of the Printer and disconnect the Power cord. Reconnect the power cord and power On the Printer. • Replace the CPU Fan. • If the System Error continues, replace the Main PCA. Only replace one component at a time and check if the error has gone before replacing another component. Using this procedure you will be able to determine exactly which component failed.
-
05.3:10
+Main memory size failure.
Solution :
• Check that at least 256 megabytes of memory is installed in the Printer. • Check that the Memory Module is installed correctly. • Try installing the Memory Module in the other Memory slot and check if the System Error appears. • If the System Error reappears, replace the Memory Module. • If the System Error does NOT reappear, then the original slot could be faulty. In this case, replace the Main PCA.
-
06:03
+NVM file has bad CRC.
Solution :
• Switch the Power OFF from the back of the Printer and disconnect the Power cord. Reconnect the power cord and power On the Printer. • If the System Error continues, replace the Hard Disk Drive.
-
06:10
+Main NVM failure - not detected, read/write failed or readback error.
Solution :
• Switch the Power OFF from the back of the Printer and disconnect the Power cord. Reconnect the power cord and power On the Printer. • If the System Error continues, replace the Hard Disk Drive.
-
07:10
+07:10
Solution :
• Replace the Interconnect PCA. • If the System Error continues, replace the Gamut PCI PCA. Only replace one component at a time and check if the error has gone before replacing another component. Using this procedure you will be able to determine exactly which component failed.
-
08:11
+Problem with the Front Panel.
Solution :
• Switch the Power OFF from the back of the Printer and disconnect the Power cord. Reconnect the power cord and power On the Printer. • Check that the Front Panel cable is not damaged and is correctly connected to the Front Panel and to the Interconnect PCA. • Check that the Memory Module is installed correctly. • Check that the cables between the Interconnect PCA and the Main PCA are not damaged and are correctly connected. • Check that the cables between the Hard Disk Drive and the Power Su
-
11:10
+Trailing Cable does not seem to be detected.
Solution :
• Check that the Trailing Cable is not damaged. • Check that the Trailing Cable is correctly connected to the Carriage PCA, Interconnect PCA and to the Gamut PCI PCA. • Replace the Gamut PCI PCA. • Replace the Ink Supply Tubes and Trailing Cable. • Replace the Carriage PCA. Only replace one component at a time and check if the error has gone before replacing another component. Using this procedure you will be able to determine exactly which component failed.
-
13.n:10
+Problem starting acumen supplies.
Solution :
• Remove ALL Ink Cartridges and reinstall them in the Printer. • Check that the ISS to Cartridge cables are not damaged and are correctly connected to the Ink Supply Tubes PCA. • Replace the ISS to Cartridge cables • Replace the Ink Supply Tubes and Trailing Cable.
-
21:03
+Service Station servo shutdown.
Solution :
• Switch the Power OFF from the back of the Printer and disconnect the Power cord. Reconnect the power cord and power On the Printer. • If the System Error continues, replace the Service Station. • Replace the PrintMech PCA. • Replace the Interconnect PCA. Only replace one component at a time and check if the error has gone before replacing another component. Using this procedure you will be able to determine exactly which component failed.
-
21:12
+Fail moving Service Station.
Solution :
• Switch the Power OFF from the back of the Printer and disconnect the Power cord. Reconnect the power cord and power On the Printer. • If the System Error continues, replace the Service Station.
-
21:13
+Problem with the Service Station.
Solution :
• Switch the Power OFF from the back of the Printer and disconnect the Power cord. Reconnect the power cord and power On the Printer. • Make sure that the Service Station path is clear. Remove any visible obstacles (e.g. screws, plastic parts, etc...) restricting the movement of the Service Station. • If the System Error continues, replace the Service Station.
-
23:10
+Problem with the APS.
Solution :
• Switch the Power OFF from the back of the Printer and disconnect the Power cord. Reconnect the power cord and power On the Printer. • Check that the APS cable is not damaged and is correctly connected to the PrintMech PCA. • Replace the APS Assembly. • Replace the PrintMech PCA. • If the System Error continues, replace the Gamut PCI PCA. Only replace one component at a time and check if the error has gone before replacing another component. Using this procedure you will be able to determine
-
24:03
+Ink Setup failure (Ink Supply Tubes purge failed).
Solution :
• Switch the Power OFF from the back of the Printer and disconnect the Power cord. Reconnect the power cord and power On the Printer. • Try purging the Ink Supply Tubes again once the Printer has been rebooted. • Install new Ink Cartridges in to the Printer and try purging the Printer again.
-
24:10
+Broken bag detected in Ink Cartridge.
Solution :
• Remove the Ink Cartridges and check for ink leakage in the ISS area. • Perform the "Bag Broken Recovery" Diagnostic to further troubleshoot the error code.
-
26:14
+A wrong Ink Cartridge has been detected.
Solution :
• Remove the Ink Cartridges and check that they are the correct ones for this Printer. • Check that the Printer has the latest Firmware version. If not, update the Firmware to the latest version. • Replace the Ink Cartridges.
-
26.0:01
+Bad contact detected in ISS slot0 floater.
Solution :
• Remove the Yellow Ink Cartridge and reinstall it in to the Printer. • Replace the Yellow Ink Cartridge. • Check that the ISS to Cartridge cable (Yellow Ink Cartridge) is not damaged and is correctly connected to the Ink Supply Tubes PCA. • Replace the ISS to Cartridge cable (Yellow Ink Cartridge). • Replace the Ink Supply Tubes and Trailing Cable.
-
26.1:01
+Bad contact detected in ISS slot1 floater.
Solution :
• Remove the Magenta Ink Cartridge and reinstall it in to the Printer. • Replace the Magenta Ink Cartridge. • Check that the ISS to Cartridge cable (Magenta Ink Cartridge) is not damaged and is correctly connected to the Ink Supply Tubes PCA. • Replace the ISS to Cartridge cable (Magenta Ink Cartridge). • Replace the Ink Supply Tubes and Trailing Cable.
-
26.2:01
+Bad contact detected in ISS slot2 floater.
Solution :
• Remove the Black Ink Cartridge and reinstall it in to the Printer. • Replace the Black Ink Cartridge. • Check that the ISS to Cartridge cable (Black Ink Cartridge) is not damaged and is correctly connected to the Ink Supply Tubes PCA. • Replace the ISS to Cartridge cable (Black Ink Cartridge). • Replace the Ink Supply Tubes and Trailing Cable.
-
26.3:01
+Bad contact detected in ISS slot3 floater.
Solution :
• Remove the Cyan Ink Cartridge and reinstall it in to the Printer. • Replace the Cyan Ink Cartridge. • Check that the ISS to Cartridge cable (Cyan Ink Cartridge) is not damaged and is correctly connected to the Ink Supply Tubes PCA. • Replace the ISS to Cartridge cable (Cyan Ink Cartridge). • Replace the Ink Supply Tubes and Trailing Cable.
-
26.n:10
+Order of Ink Supplies incorrect.
Solution :
• Remove the Ink Cartridges and check that they are the correct ones for this Printer and that they are inserted in the correct position. • Check that the Printer has the latest Firmware version. If not, update the Firmware to the latest version.
-
27:03
+An error has occurred in Printhead detection.
Solution :
• Switch the Power OFF from the back of the Printer and disconnect the Power cord. Reconnect the power cord and power On the Printer. • Remove the Printheads from the Carriage and reinsert them. • Replace the Printheads. • Replace the Carriage Flex Cables.
-
27:14
+A wrong Printhead has been detected.
Solution :
• Remove the Printheads and check that they are the correct ones for this Printer. • Check that the Printer has the latest Firmware version. If not, update the Firmware to the latest version. • Replace the Printheads.
-
29.0:01
+Printhead Cleaner not inserted correctly in slot 1.
Solution :
• Open the Printhead Cleaner Access Door and check that the Yellow Printhead Cleaner is correctly seated in slot 1 of the Service Station and then close the Printhead Cleaner Access Door. • Replace the Yellow Printhead Cleaner in slot 1 of the Service Station.
-
29.1:01
+Printhead Cleaner not inserted correctly in slot 2.
Solution :
• Open the Printhead Cleaner Access Door and check that the Yellow Printhead Cleaner is correctly seated in slot 2 of the Service Station and then close the Printhead Cleaner Access Door. • Replace the Yellow Printhead Cleaner in slot 2 of the Service Station.
-
29.2:01
+Printhead Cleaner not inserted correctly in slot 3.
Solution :
• Open the Printhead Cleaner Access Door and check that the Magenta Printhead Cleaner is correctly seated in slot 3 of the Service Station and then close the Printhead Cleaner Access Door. • Replace the Magenta Printhead Cleaner in slot 3 of the Service Station.
-
29.3:01
+Printhead Cleaner not inserted correctly in slot 4.
Solution :
• Open the Printhead Cleaner Access Door and check that the Magenta Printhead Cleaner is correctly seated in slot 4 of the Service Station and then close the Printhead Cleaner Access Door. • Replace the Magenta Printhead Cleaner in slot 4 of the Service Station.
-
29.4:01
+Printhead Cleaner not inserted correctly in slot 5.
Solution :
• Open the Printhead Cleaner Access Door and check that the Black Printhead Cleaner is correctly seated in slot 5 of the Service Station and then close the Printhead Cleaner Access Door. • Replace the Black Printhead Cleaner in slot 5 of the Service Station.
-
29.5:01
+Printhead Cleaner not inserted correctly in slot 6.
Solution :
• Open the Printhead Cleaner Access Door and check that the Black Printhead Cleaner is correctly seated in slot 6 of the Service Station and then close the Printhead Cleaner Access Door. • Replace the Black Printhead Cleaner in slot 6 of the Service Station.
-
29.6:01
+Printhead Cleaner not inserted correctly in slot 7.
Solution :
• Open the Printhead Cleaner Access Door and check that the Cyan Printhead Cleaner is correctly seated in slot 7 of the Service Station and then close the Printhead Cleaner Access Door. • Replace the Cyan Printhead Cleaner in slot 7 of the Service Station.
-
29.7:01
+Printhead Cleaner not inserted correctly in slot 8.
Solution :
• Open the Printhead Cleaner Access Door and check that the Cyan Printhead Cleaner is correctly seated in slot 8 of the Service Station and then close the Printhead Cleaner Access Door. • Replace the Cyan Printhead Cleaner in slot 8 of the Service Station.
-
41:03
+Electrical current limit in Media-Axis Motor.
Solution :
• Switch the Power OFF from the back of the Printer and disconnect the Power cord. Reconnect the power cord and power On the Printer. • Open the Window and check for any visible obstacles restricting the movement of the Drive Roller. If there is a wrinkled mass of media inside the paper path, lift the Pinchwheels (using the Media Lever) and clear the obstruction. • Replace the Media-Axis Motor. • If the System Error continues, replace the PrintMech PCA.
-
41:10
+Electrical fault in Media-Axis Motor.
Solution :
• Switch the Power OFF from the back of the Printer and disconnect the Power cord. Reconnect the power cord and power On the Printer. • Check that the Media-Axis Motor cable is not damaged and is correctly connected to the PrintMech PCA. • Replace the Media-Axis Motor. • If the System Error continues, replace the PrintMech PCA.
-
42:03
+Electrical current limit in Scan-Axis Motor.
Solution :
• Switch the Power OFF from the back of the Printer and disconnect the Power cord. Reconnect the power cord and power On the Printer. • Open the Window and check for any visible obstacles restricting the movement of the Carriage Assembly. If there is a wrinkled mass of media blocking the Carriage Assembly, then clear the obstruction. • Replace the Scan-Axis Motor. • If the System Error continues, replace the PrintMech PCA.
-
42:10
+Electrical fault in Scan-Axis Motor.
Solution :
• Switch the Power OFF from the back of the Printer and disconnect the Power cord. Reconnect the power cord and power On the Printer. • Check that the Scan-Axis Motor cable is not damaged and is correctly connected to the PrintMech PCA. • Replace the Scan-Axis Motor. • If the System Error continues, replace the PrintMech PCA.
-
43:10
+Vacuum Fan has stopped functioning.
Solution :
• Switch the Power OFF from the back of the Printer and disconnect the Power cord. Reconnect the power cord and power On the Printer. • Check that the Vacuum Fan cables are not damaged and are correctly connected to the Interconnect PCA. • Also check that the cables between the Interconnect PCA and the PrintMech PCA are not damaged and are correctly connected. • Replace the Vacuum Fan. • If the System Error continues, replace the PrintMech PCA.
-
44:10
+Problem with the Aerosol Fan.
Solution :
• Switch the Power OFF from the back of the Printer and disconnect the Power cord. Reconnect the power cord and power On the Printer. • Check that the Aerosol Fan cable is not damaged and is correctly connected to the Interconnect PCA. • Replace the Aerosol Fan. • If the System Error continues, replace the Interconnect PCA.
-
44:11
+Aerosol Fan not connected.
Solution :
• Check that the Aerosol Fan cable is not damaged and is correctly connected to the Interconnect PCA. • Replace the Aerosol Fan.
-
51:10
+Window Sensor failure.
Solution :
• Check that the Window Sensor cable is not damaged and is correctly connected to the Interconnect PCA. • Replace the Window Sensor.
-
51.1:10
+PHC Access Door Sensor failure.
Solution :
• Check that the PHC Access Door Sensor cable is not damaged and is correctly connected to the Interconnect PCA. • Replace the PHC Access Door Sensor.
-
52:10
+Drop Detector switch On/Off failure.
Solution :
• Switch the Power OFF from the back of the Printer and disconnect the Power cord. Reconnect the power cord and power On the Printer. • Check that the Drop Detector cable is not damaged and is correctly connected to the Service Station cable. • Check that the Service Station cable is not damaged and is correctly connected to the Interconnect PCA. • Replace the Drop Detector. • Replace the Gamut PCI PCA. • If the System Error continues, replace the Interconnect PCA. Only replace one component
-
53:10
+Media Sensor failure.
Solution :
• Check that the Media Sensor cable is not damaged and is connected correctly to the Interconnect PCA. • Replace the Media Sensor.
-
54:10
+Media Lever Sensor failure.
Solution :
• Check that the Media Lever Sensor cable is not damaged and is connected correctly to the Interconnect PCA. • Replace the Media Lever Sensor.
-
55:10
+Problem with the Line Sensor.
Solution :
• Switch the Power OFF from the back of the Printer and disconnect the Power cord. Reconnect the power cord and power On the Printer. • Replace the Line Sensor. • If the System Error continues, replace the Carriage PCA.
-
56:03
+Analog Encoder calibration failed.
Solution :
• Switch the Power OFF from the back of the Printer and disconnect the Power cord. Reconnect the power cord and power On the Printer. • Replace the Encoder Disc and Sensor. • If the System Error continues, replace the PrintMech PCA.
-
56:10
+Analog Encoder calibration failed.
Solution :
• Replace the Encoder Disc and Sensor.
-
61:01
+The file format is incorrect and the Printer cannot process the job.
Solution :
• Switch the Power OFF from the back of the Printer and disconnect the Power cord. Reconnect the power cord and power On the Printer. • Check the graphic language setting of the Printer (Refer to the User’s Guide). • Resend the file to the Printer. • Check that the Printer has the latest Firmware version. If not, update the Firmware to the latest version.
-
61:04.1
+The Postscript fonts are missing. Upgrading the Firmware will re-install the fonts.
Solution :
Perform a full firmware upgrade that includes package ’B’.
-
61:08.1
+The file cannot be printed because it is password protected.
Solution :
Resend the file without password protection.
-
63:04
+Input/Output problem through the Network Card.
Solution :
• Check that the Network cable is correctly connected to the Network Card. • If a Gigabit Ethernet Card is being used, make sure it is correctly installed. If necessary, replace the Gigabit Ethernet Card. • Check that the Printer has the latest Firmware version. If not, update the Firmware to the latest version. • If the System Error continues, replace the Main PCA.
-
64:04
+Input/Output problem through the USB Port.
Solution :
• Check that the USB cable is correctly connected to the Printer. • Check that the USB Card is correctly installed. • Check that the Printer has the latest Firmware version. If not, update the Firmware to the latest version. • Replace the USB card.
-
65:04
+Input/Output problem through an unknown port.
Solution :
• Check that the unknown port cable is correctly connected to the Printer. • Check that the Printer has the latest Firmware version. If not, update the Firmware to the latest version.
-
66:08
+Cannot print file on current paper type. The paper type has changed since the file was sent, so the file cannot be printed on the paper type currently loaded.
Solution :
• Resend the file to be printed on the current paper type. • Change the paper type to the type that was loaded when the file was originally sent.
-
67:04
+Input/Output problem through an Firewire Port.
Solution :
• Check that the Firewire cable is correctly connected to the Printer. • Check that the Printer has the latest Firmware version. If not, update the Firmware to the latest version. • If the System Error continues, replace the Main PCA.
-
68:03
+Non-critical permanent data was lost. This does not prevent the Printer to work, only that internal life counters will not be recorded until the Printer is restarted.
Solution :
• Switch the Power OFF from the back of the Printer and disconnect the Power cord. Reconnect the power cord and power On the Printer. • Check that the Printer has the latest Firmware version. If not, update the Firmware to the latest version.
-
71:03
+Out of memory failure.
Solution :
It is recommended that you remove any unnecessary files from the Hard Disk Drive using the Web Server.
-
71:04
+Out of memory failure.
Solution :
It is recommended that you remove any unnecessary files from the Hard Disk Drive using the Web Server.
-
71:19
+Default Serial Number found in the main and backup NVM. It seems that both the Ink Supply Tubes and Hard Disk Drive have been replaced together.
Solution :
• Perform the "Error 71:19 Recovery" Service Utility (refer to Chapter 4). You MUST NEVER replace both the Hard Disk Drive and the Ink Supply Tubes and Trailing Cable at the same time. If both parts need to replaced, you MUST first replace one part and then power ON the Printer until it completely initializes. Then you can power OFF the Printer and replace the other part.
-
72:04
+Generic Firmware error.
Solution :
• Switch the Power OFF from the back of the Printer and disconnect the Power cord. Reconnect the power cord and power On the Printer. • Check that the Printer has the latest Firmware version. If not, update the Firmware to the latest version.
-
73:03
+Servo Error.
Solution :
• Switch the Power OFF from the back of the Printer and disconnect the Power cord. Reconnect the power cord and power On the Printer. • Check that the Printer has the latest Firmware version. If not, update the Firmware to the latest version. • Perform the "Scan-Axis" Diagnostic to further troubleshoot the error code. • If the System Error continues, perform the "Media Drive" Diagnostic to further troubleshoot the error code.
-
74:00
+Failed getting Part Number/Serial Number.
Solution :
• Switch the Power OFF from the back of the Printer and disconnect the Power cord. Reconnect the power cord and power On the Printer. • Check that the Printer has the latest Firmware version. If not, update the Firmware to the latest version.
-
74:01
+Error uploading firmware update file.
Solution :
• Switch the Power OFF from the back of the Printer and disconnect the Power cord. Reconnect the power cord and power On the Printer. • Resend the firmware update file to the Printer.
-
74:04
+Old Vacuum Fan detected - upgrade the Firmware.
Solution :
• Check that the Printer has the latest Firmware version. If not, update the Firmware to the latest version.
-
76:03
+Out of Disk space - Data was lost.
Solution :
• Switch the Power OFF from the back of the Printer and disconnect the Power cord. Reconnect the power cord and power On the Printer. • Resend the file to the Printer. • If the System Error continues, it is recommended that you remove any unnecessary files from the Hard Disk Drive using the Web Server. • Perform an EEROM Reset and resend the file to the Printer.
-
77:04
+Embedded Web Server internal software error.
Solution :
• Switch the Power OFF from the back of the Printer and disconnect the Power cord. Reconnect the power cord and power On the Printer. • Check that the Printer has the latest Firmware version. If not, update the Firmware to the latest version.
-
79:03
+Generic Firmware error.
Solution :
• Switch the Power OFF from the back of the Printer and disconnect the Power cord. Reconnect the power cord and power On the Printer. • Check that the Printer has the latest Firmware version. If not, update the Firmware to the latest version.
-
79:04
+Generic Firmware error.
Solution :
• Switch the Power OFF from the back of the Printer and disconnect the Power cord. Reconnect the power cord and power On the Printer. • Check that the Printer has the latest Firmware version. If not, update the Firmware to the latest version.
-
79.1:04
+CDS server lost connection with client.
Solution :
• Switch the Power OFF from the back of the Printer and disconnect the Power cord. Reconnect the power cord and power On the Printer. • Check that the Printer has the latest Firmware version. If not, update the Firmware to the latest version.
-
81:01
+Paper servo shutdown.
Solution :
• Open the Window and check for any visible obstacles restricting the movement of the Drive Roller. If there is a wrinkled mass of media inside the paper path, lift the Pinchwheels (using the Media Lever) and clear the obstruction. • Perform the "Media Drive" Diagnostic to further troubleshoot the error code. • If the System Error continues, replace the Media-Axis Motor.
-
81:03
+It was impossible to correctly stop the servo before setting the encoder position.
Solution :
• Open the Window and check for any visible obstacles restricting the movement of the Drive Roller. If there is a wrinkled mass of media inside the paper path, lift the Pinchwheels (using the Media Lever) and clear the obstruction. • Perform the "Media Drive" Diagnostic to further troubleshoot the error code. • If the System Error continues, replace the Media-Axis Motor.
-
81:10
+Fail starting Paper Motor.
Solution :
• Open the Window and check for any visible obstacles restricting the movement of the Drive Roller. If there is a wrinkled mass of media inside the paper path, lift the Pinchwheels (using the Media Lever) and clear the obstruction. • Perform the "Media Drive" Diagnostic to further troubleshoot the error code. • If the System Error continues, replace the Media-Axis Motor.
-
85:03
+Problem finding the Drive Roller zero.
Solution :
• Perform the "Media Drive" Diagnostic to further troubleshoot the error code.
-
86:01
+Carriage servo shutdown.
Solution :
• Open the Window and check for any visible obstacles restricting the movement of the Carriage Assembly. If there is a wrinkled mass of media inside the paper path, lift the Pinchwheels (using the Media Lever) and clear the obstruction. • Check that the Carriage Stopper is correctly installed (Refer to Carriage Disassembly Instructions, Step 16.). • Perform the "Scan-Axis" Diagnostic to further troubleshoot the error code. • If the System Error continues, replace the Scan-Axis Motor
-
86:03
+Scan-Axis length test failure.
Solution :
• Perform the "Scan-Axis" Diagnostic to further troubleshoot the error code.
-
86:10
+Initializing Scan-Axis Motor failure.
Solution :
• Switch the Power OFF from the back of the Printer and disconnect the Power cord. Reconnect the power cord and power On the Printer. • Check that the Carriage Belt is correctly installed. • Replace the Encoder Strip and Encoder Sensor. • If the System Error continues, replace the Scan-Axis Motor.
-
86:11
+Scan-Axis length too short.
Solution :
• Open the Window and check for any visible obstacles restricting the movement of the Carriage Assembly. If there is a wrinkled mass of media inside the paper path, lift the Pinchwheels (using the Media Lever) and clear the obstruction. • Replace the Encoder Strip and Encoder Sensor.
-
91:02
+The HP Instant Support troubleshooting tool has detected that at least one Printhead has been replaced without having a specific error, and without being recovered/cleaned.
Solution :
Advise the customer that the next time they want to replace a Printheads they should make sure that at least a Printhead Recovery is performed.
-
91:10
+The HP Instant Support troubleshooting tool has detected that at least, for one Printhead: It is currently in warranty (less than 1000cc of ink used). That the previous 2 Printheads had been found defective within the warranty period.
Solution :
In this case, it is possible that the Printer is damaging the Printhead. If, after replacing the Printhead a third time, it is found to be defective again, you may need to troubleshoot the Carriage Flex Cables or the Carriage PCA.
-
93:11
+Unable to pressurize the IDS.
Solution :
• Remove ALL the Ink Cartridges and reinstall them one by one in to the Printer. • Replace the Ink Cartridges. • Replace the APS Assembly. • If the System Error continues, replace the Ink Supply Tubes and Trailing Cable.
Problèmes fréquents
Cliquez sur + pour voir l'explication et les solutions
-
Se bloque au démarrage
Un traceur HP DesignJet 4000, 4020, 4500 et 4520 qui bloque au démarrage a généralement un problème de carte mère (Carte formatter ou Main PCA ou electronic module)
+HP DesignJet 4000, 4020, 4500 et 4520 qui bloque au démarrage a la carte formatter ou la Main PCA HS.
Son remplacement est complexe car il nécessite un démontage important.Cause :
La carte formatter ou la Main PCA est HS, il va falloir la remplacer.
Intervention technicien :
Le remplacement de la carte nécessite l'intervention d'un technicien.
Prévoir 1 à 3 heures d'intervention + déplacement + le prix de la pièce. -
Alimenté mais ne démarre pas
Un traceur HP DesignJet 4000, 4020, 4500 et 4520 qui ne démarre pas a généralement un problème de carte mère (Carte formatter ou Main PCA ou electronic module).
+HP DesignJet 4000, 4020, 4500 et 4520 qui s'allume mais ne démarre pas a la carte formatter ou la Main PCA HS.
Son remplacement est complexe car il nécessite un démontage important.Cause :
La carte formatter ou la Main PCA est HS, il va falloir la remplacer.
Intervention technicien :
Le remplacement de la carte nécessite l'intervention d'un technicien.
Prévoir 1 à 3 heures d'intervention + déplacement + le prix de la pièce. -
L'écran reste blanc
Un traceur HP DesignJet 4000, 4020, 4500 et 4520 dont l'écran reste blanc (éclairé mais sans aucune inscription) a un problème de carte mère (carte formatter ou Main PCA).
+HP DesignJet 4000, 4020, 4500 et 4520 qui s'allume avec un écran blanc à la carte formatter ou la Main PCA HS.
Son remplacement est complexe car il nécessite un démontage important.Cause :
La carte formmater ou la Main PCA est HS, il faut la remplacer.
Intervention technicien :
1/ Identifier précisément la pièce à remplacer à l'aide des 3 voyant qui se trouvent à côté de la prise réseau.
2/ Faire intervenir un technicien pour remplacer la pièce défectueuse, prévoir 1 à 3 heures de main d'oeuvre + déplacement + la fourniture de la pièce. -
Le traceur HP DesignJet 4000, 4020, 4500 et 4520 ne répond pas aux ordres du PC
Le traceur HP DesignJet 4000, 4020, 4500 et 4520 est allumé, affiche prêt, mais ne réagit pas.
+HP DesignJet 4000, 4020, 4500 et 4520 qui démarre correctement mais ne répond pas aux ordres du PC a un problème de communication.
Le problème peut avoir plusieurs origines : Adresse IP mal paramétrée, mauvais pilote d'impression, câble HS...
La recherche du "coupable" peut être compliquée.Cause :
Les causes possibles sont :
- Le câble réseau est HS ou déconnecté.
- Il y a un problème d'adresse IP : Conflit d'adresse, adresse changée, box inaccessible...
- Le pilote est corrompu ou pas compatible.Auto-dépannage :
Vérifiez la connexion physique du réseau (les câbles, la box, le switch...)
Vérifiez l'adresse IP du traceur HP DesignJet 4000, 4020, 4500 et 4520 (changement d'adresse, absence de conflit...)
Vérifiez le pilote d'impression
Si tout est en ordre il se peut que la carte réseau du traceur HP DesignJet 4000, 4020, 4500 et 4520 soit HS.Intervention technicien :
Pour une interventions sur site prévoir 1 à 3 heures pour faire tous les tests étape par étape et identifier l'origine du problème + déplacement + fourniture éventuelle d'une carte réseau.
-
Pas d'alimentation électrique
Un traceur HP DesignJet 4000, 4020, 4500 et 4520 qui ne présente aucune trace d'alimentation électrique a probablement le bloc alimentation HS.
+HP DesignJet 4000, 4020, 4500 et 4520 qui n'est plus du tout alimenté a le bloc d'alimentation HS.
Son remplacement est complexe car il nécessite un démontage important.Cause :
Le bloc d'alimentation est HS, il va falloir le remplacer.
Intervention technicien :
Le remplacement du bloc d'alimentation nécessite l'intervention d'un technicien.
Prévoir 1 à 2 heures d'intervention + déplacement + le prix de la pièce. -
Problème de qualité d'impression
Votre traceur HP DesignJet 4000, 4020, 4500 et 4520 a une mauvaise qualité d'impression.
+HP DesignJet 4000, 4020, 4500 et 4520 qui a un problème de qualité d'impression (couleurs non conformes, couleurs non homogènes, traits mal formés, bavures, impressions vierge ou incomplètes...) a des têtes d'impression en mauvais état.
Vous pouvez essayer de lancer une procédure de nettoyage des têtes d'impression. Si la procédure ne résout pas le problème, c'est qu'il faut remplacer les têtes. Vous pouvez nous les commander et essayer de les remplacer par vous même.
En cas de doute, faites nous intervenir, notre technicien en profitera pour faire une révision du traceur HP DesignJet 4000, 4020, 4500 et 4520.Cause :
Il y a de fortes chances pour les têtes d'impression de votre traceur HP DesignJet 4000, 4020, 4500 et 4520 soient usées.
La majorité des problèmes de qualité d'impression (couleurs non conformes, couleurs non homogènes, traits mal formés, bavures, impressions vierge ou incomplètes...) sont causés par des têtes d'impression usées ou HS .Auto-dépannage :
Commencez par remplacer les têtes d’impression de votre traceur HP DesignJet 4000, 4020, 4500 et 4520.
Contrairement aux cartouches, les têtes d’impression de votre traceur HP DesignJet 4000, 4020, 4500 et 4520 ne sont pas pleines ou vides.
Elles s’usent au four et à mesure de leur utilisation et de leur âge.
Selon l’intensité et l’usage du traceur HP DesignJet 4000, 4020, 4500 et 4520, un jeu de têtes aura une espérance de vie de plusieurs mois à plusieurs années.
Le traceur HP DesignJet 4000, 4020, 4500 et 4520 mémorise l’usage des têtes d’impressions. Il arrive qu’un traceur HP DesignJet 4000, 4020, 4500 et 4520 propose ou exige le remplacement de têtes trop usées ou en mauvais état.
Il arrive aussi que les têtes d’impression soient usées et provoquent de mauvaises impressions sans que le traceur HP DesignJet 4000, 4020, 4500 et 4520 ne signale quoi que ce soit.
Si c’est le cas, n’hésitez pas à remplacer vos têtes d’impression.
Attention, le remplacement des têtes d'impression nécessite d'avoir des cartouches suffisamment pleines.Intervention technicien :
Si vous ne souhaitez pas remplacer les têtes par vous-même, nous pouvons intervenir pour les remplacer, prévoir 1 heure de main d'oeuvre + déplacement + fournitures des têtes neuves + fourniture éventuelle de cartouches neuves (nécessaires au remplacement des têtes d'impression).
Si le remplacement des têtes d'impression est impossible ou si le problème n'est pas résolu, c'est que le problème est plus complexe, prévoir alors une intervention de 1 heure à 3 heures + déplacement fourniture éventuelle de pièces détachées (station service, inktube, chariot...)
Nomenclature des pièces détachées
Aucune pièce trouvée — contactez-nous
- C4820-80100 1- Printhead Return Kit
- C6090-60112 3- ADAPTORS SVC
- Q1273-60121 42 SPINDLE SVC
- P5311H 6 IEEE 1394 Firewire Cable
- Q1273-60226 Aerosol fan assy MR serv
- Q1273-60047 Aerosol FAN assy SERV, Part Q1273-60047 is no longer supplied. Please order the replacement, Q1273-60226
- Q1273-60084 Aerosol filter SERV
- Q1273-60227 Aps system MR serv
- Q1273-60068 APS system SERV, Part Q1273-60068 is no longer supplied. Please order the replacement, Q1273-60227
- CQ109-67004 BELT AND TENSION KIT MR SERV 42
- Q1273-60228 Belt and tension kit MR serv, Part Q1273-60228 is no longer supplied. Please order the replacement, CQ109-67004
- Q1273-60069 Belt and tension kit SERV
- Q1271-60457 Bin Assembly serv
- Q1273-60229 Bracket left RM serv
- Q1273-60085 bracket left SERV, Part Q1273-60085 is no longer supplied. Please order the replacement, Q1273-60229
- Q1273-60086 bracket right SERV
- Q1273-60230 Cable kit of eebox (6) MR serv
- Q1273-60076 Cable kit of EEBOX (6) SERV, Part Q1273-60076 is no longer supplied. Please order the replacement, Q1273-60230
- CH955-67115 CAL Left Arc
- CH955-67114 CAL Right Arc
- Q1273-60218 Calibration Serv Sheets Kit, Part Q1273-60218 is no longer supplied. Please order the replacement, Q1273-60296
- Q1273-60231 Carriage assy (w/o pca) MR serv
- Q1273-60051 Carriage assy (w/o PCA) serv, Part Q1273-60051 is no longer supplied. Please order the replacement, Q1273-60231
- Q1273-60232 Carriage flex cables RM serv
- Q1273-60115 carriage Flex cables serv, Part Q1273-60115 is no longer supplied. Please order the replacement, Q1273-60232
- Q1273-69233 CARRIAGE PCA RM (EMEA ONLY)
- Q1273-69157 Carriage PCA Serv with cable
- Q1273-69299 CARRIAGE PCA SERV, Part Q1273-69299 is no longer supplied. Please order the replacement, Q1273-69157
- Q1273-69116 CARRIAGE PCA SVC (EMEA ONLY)
- Q1273-60234 Cartridges trays RM serv
- Q1273-60102 cartridges trays SERV, Part Q1273-60102 is no longer supplied. Please order the replacement, Q1273-60234
- 5961-3590 CBL : Jumper Cord, C14 to C19 straight
- 5961-3589 CBL : Power Cord, Australia, 10am-C19st,
- 5961-3588 CBL : Power Cord, China, 10 amp - C19st,
- Q1273-60235 Center guide MR serv
- Q1273-60059 center guide SERV, Part Q1273-60059 is no longer supplied. Please order the replacement, Q1273-60235
- Q1273-60041 Center Platen assy SERV
- 5090-3379 CLOTH, TONER CLEANING
- Q1273-60106 Conector cover right SERV
- Q1273-60105 Connector cover left SERV
- Q1273-60271 Cutter assy serv RoHS
- Q1273-60062 Cutter Assy SERV, Part Q1273-60062 is no longer supplied. Please order the replacement, Q1273-60271
- Q1271-60743 DJ 4X00 X-brace Hardware assy SV
- Q1273-60039 Drive roller SERV
- Q1273-60066 Drop detector SERV
- Q1273-60237 Eio2pci interface MR serv
- Q1273-60077 EIO2PCI interface SERV, Part Q1273-60077 is no longer supplied. Please order the replacement, Q1273-60237
- Q1273-60238 Empty eebox MR serv
- Q1273-60083 empty EEBOX SERV
- Q1273-60239 Encoder strip_sensor kit MR serv
- Q1273-60070 Encoder strip_sensor kit SERV, Part Q1273-60070 is no longer supplied. Please order the replacement, Q1273-60239
- Q1271-60454 Foot Assembly SERV
- Q1273-60240 Front panel + cable MR serv
- Q1273-60045 Front panel + cable SERV
- Q1273-60101 front panel bezel SERV
- Q1273-60060 front platen SERV
- Q1273-69298 GAMUT PCA SERV
- Q1273-69241 GAMUT PCI PCA MR (EMEA ONLY), Part Q1273-69241 is no longer supplied. Please order the replacement, Q1273-69298
- Q1273-69074 GAMUT PCI PCA SVC (EMEA ONLY), Part Q1273-69074 is no longer supplied. Please order the replacement, Q1273-69298
- Q1273-60242 Gears kit+ roller brake RM serv
- Q1273-60087 Gears kit+ roller brake SERV, Part Q1273-60087 is no longer supplied. Please order the replacement, Q1273-60242
- Q5679-60001 Gigabit Ethernet PCI Card sv
- Q1271-60160 GW CPU FAN Service Kit
- Q1271-60420 GW MAINTENANCE KIT GENERIC
- Q1273-60302 GW Trailing Cables(Data and power) Serv, Part Q1273-60302 is no longer supplied. Please order the replacement, Q1273-60158
- Q1271-60458 Hardware kit serv +screws SERV
- Q1273-69044 HDD + holder and screws serv
- Q1273-69225 HDD + HOLDER AND SCREWS SERV
- Q1273-69281 HDD + HOLDER AND SCREWS SERV, Part Q1273-69281 is no longer supplied. Please order the replacement, Q1271-69751
- Q1271-69751 HDD SV
- C5059A HP 90 775ml Black Ink Cartridge
- C5082A HP 90 Black 3 Ink Cartridge Multi Pack
- C5058A HP 90 Black 400 ml Ink Cartridge
- C5054A HP 90 Black Printhead and Cleaner
- C5096A HP 90 Black Printhead Cleaner
- C5078A HP 90 Black Value Pack Ink Cartridge
- C5060A HP 90 Cyan 225 ml Ink Cartridge
- C5083A HP 90 Cyan 3 Ink Cartridge Multi Pack
- C5061A HP 90 Cyan 400 ml Ink Cartridge
- C5055A HP 90 Cyan Printhead and Cleaner
- C5079A HP 90 Cyan Value Pack Ink Cartridge
- C5056A HP 90 Magenta Printhead and Cleaner
- C5062A HP 90 Magenta 225 ml Ink Cartridge
- C5084A HP 90 Magenta 3 Ink Cartridge Multi Pack
- C5063A HP 90 Magenta 400 ml Ink Cartridge
- C5080A HP 90 Magenta Value Pack Ink Cartridge
- C5064A HP 90 Yellow 225 ml Ink Cartridge
- C5085A HP 90 Yellow 3 Ink Cartridge Multi Pack
- C5065A HP 90 Yellow 400 ml Ink Cartridge
- C5057A HP 90 Yellow Printhead and Cleaner
- C5081A HP 90 Yellow Value Pack Ink Cartridge
- C1861A HP LF Bright White Inkjet Paper 36- Roll
- C3875A HP LF Clear Film (36- x 75 ft) Roll
- C3868A HP LF Natural Tracing Paper, 36-x150 ft
- 51642B HP LF Polyester Film, 36- Roll
- C3859A HP LF Translucent Bond (36-x150 ft) Roll
- C3861A HP LF Vellum (36- x 150 ft) Roll
- Q7991A HP Prem Ins Dry Gls 24x75 Pht Paper
- Q7993A HP Prem Ins Dry Gls 36x100 Pht Paper
- Q1943A HP Prod. Photo Semi-Gloss 36-x100 ft
- Q1938A HP Productivity Photo Gloss, 36-x100 ft
- Q6581A HP Universal 42in x 100 Photo Semi Gloss
- C6090-60105 HUB BLUE
- Q1273-60103 input roll support SERV
- Q1273-60058 input roller (black roll) SERV
- Q1273-60296 inst.dry photo gloss Calibration Svc kit
- Q1273-60267 Interconnect pca rev c serv RoHS
- Q1273-60203 Interconnect PCA rev C SERV, Part Q1273-60203 is no longer supplied. Please order the replacement, Q1273-60267
- Q1273-60075 Interconnect PCA SERV
- Q1273-60244 Iss (without aps pump) MR serv
- Q1273-60049 ISS (without APS pump) SERV, Part Q1273-60049 is no longer supplied. Please order the replacement, Q1273-60244
- Q1273-60117 ISS tocartridge cable con.SERV, Part Q1273-60117 is no longer supplied. Please order the replacement, Q1273-60245
- Q1273-60245 Iss tocartridge cable MR serv
- Q1273-60125 kit of 3 sheets for calibration SERV
- Q1273-60130 labels kit (with SN label) serv
- Q1273-60098 left arc SERV, Part Q1273-60098 is no longer supplied. Please order the replacement, CH955-67115
- Q1273-60053 Left cover (without door) SERV
- Q1273-60293 left door for cartridge SERV
- Q1273-60091 left door for cartridge SERV, Part Q1273-60091 is no longer supplied. Please order the replacement, Q1273-60293
- Q1273-60096 Left hand Trim SERV
- Q1271-60459 Leg cover
- Q1271-60455 Legs Assembly SERV
- Q1397A LF Bond 36- x 150 ft
- C6036A LF Bright White Inkjet 914mm x 45,7m
- Q1412A LF Heavyweight Coated Paper 24- x 100
- Q1427A LF High Gloss Photo Paper 36- x 100 f
- C7952A LF Proofing Paper RC Satin 36- x 75 ft
- Q1421A LF Semi-Gloss Photo Paper 36- x 100 f
- 5183-5283 LFP IDS
- Q1273-60246 Line and color sensor MR serv
- Q1273-60063 line and color sensor SERV, Part Q1273-60063 is no longer supplied. Please order the replacement, Q1273-60246
- Q1273-60073 media deflectors kit SERV
- Q1273-60082 media lever sensor SERV
- Q1273-60247 Media motor MR serv
- Q1273-60037 Media motor SERV, Part Q1273-60037 is no longer supplied. Please order the replacement, Q1273-60247
- Q1273-60079 Media presence sensor SERV
- Q1273-60248 Media roller encoder kit RM serv
- Q1273-60094 Media Roller encoder kit SERV, Part Q1273-60094 is no longer supplied. Please order the replacement, Q1273-60248
- Q1273-60249 Memory module 256mb RM serv
- Q1273-60078 Memory module 256MB SERV, Part Q1273-60078 is no longer supplied. Please order the replacement, Q1273-60249
- Q1273-60272 Metal parts kit of eebox serv RoHS
- Q1273-60065 metal parts kit of EEBOX SERV, Part Q1273-60065 is no longer supplied. Please order the replacement, Q1273-60272
- Q1273-60277 Middle left spittoons serv RoHS
- Q1273-60100 middle left spittoons SERV, Part Q1273-60100 is no longer supplied. Please order the replacement, Q1273-60277
- Q1273-60099 most left spittoons SERV
- Q1273-60158 NEW GW TRAILING CABLES
- Q1273-69158 New GW Trailing Cables
- Q1273-60236 p detector MR serv
- Q1273-69250 PCA FORMATER + PROC.+ HS-RC
- Q1273-69043 PCA FORMATER+PROC+HS (EMEA), Part Q1273-69043 is no longer supplied. Please order the replacement, Q1273-69250
- Q5680-60001 PCI USB PCA sv
- Q1273-60164 PINCH WHEELS KIT SERV
- Q1273-60104 Pinch wheels kit serv (only wheels), Part Q1273-60104 is no longer supplied. Please order the replacement, Q1273-60165
- Q1273-60061 PM kit1 (tube,carri.,...) SERV
- Q1273-69055 PRINTMECH PCA SERV, Part Q1273-69055 is no longer supplied. Please order the replacement, Q1273-69269
- Q1273-69269 PRINTMECH PCA SV-RC
- Q1273-69251 PSU MR SERV
- Q1273-69056 PSU SERV, Part Q1273-69056 is no longer supplied. Please order the replacement, Q1273-69251
- Q1273-60092 push-push mechanism SERV
- 8121-0917 PWR-CORD OPT-903 3-COND 2.5-M-LG ROHS
- 8121-0922 PWR-CORD OPT-927 3-COND 2.5-M-LG ROHS
- Q1273-60143 QRG Holder SERV
- Q1273-60088 Quick ref. guide holder SERV, Part Q1273-60088 is no longer supplied. Please order the replacement, Q1273-60143
- Q1273-60107 Rear door SERV
- Q1273-60266 Rear tube brackets serv RoHS
- Q1273-60112 rear tube Brackets serv, Part Q1273-60112 is no longer supplied. Please order the replacement, Q1273-60266
- Q1273-60097 Right arc SERV, Part Q1273-60097 is no longer supplied. Please order the replacement, CH955-67114
- Q1273-60137 Right carriage bump + oth SERV, Part Q1273-60137 is no longer supplied. Please order the replacement, Q1273-60252
- Q1273-60252 Right carriage bump MR serv
- Q1273-60054 Right cover (w/o door) SERV
- Q1273-60294 right door of PHC SERV
- Q1273-60090 right door of PHC SERV, Part Q1273-60090 is no longer supplied. Please order the replacement, Q1273-60294
- Q1273-60095 Right hand Trim SERV
- Q1273-60276 Right lever assembly kit serv RoHS
- Q1273-60093 right lever assembly kit SERV, Part Q1273-60093 is no longer supplied. Please order the replacement, Q1273-60276
- Q1273-60136 Right spindle lever SERV
- Q1273-60274 Roll module left assy serv RoHS
- Q1273-60080 Roll Module left assy SERV, Part Q1273-60080 is no longer supplied. Please order the replacement, Q1273-60274
- Q1273-60081 Roll Module right assy SERV
- Q1273-60275 Roll module right assy serv RoHS
- Q1273-60071 SCAN AXIS Motor assy SERV
- Q1271-60751 Service Hard disk :, Part Q1271-60751 is no longer supplied. Please order the replacement, Q1271-69751
- Q1273-60111 setup printhead kit (4) SERV
- Q1273-60108 SRK tube clips SERV
- Q1273-60300 SRK Tubes w/o Trailing Cables Serv
- Q1273-60254 Srk tubes+trailing cables MR serv, Part Q1273-60254 is no longer supplied. Please order the replacement, Q1273-60300
- Q1273-60050 SRK tubes+trailing cables SERV
- Q1273-60165 SUB-PINCH WHEEL ASSY SERV
- Q1273-60273 Svs cable + right switch serv RoHS
- Q1273-60067 SVS cable + right switch SERV, Part Q1273-60067 is no longer supplied. Please order the replacement, Q1273-60273
- CM765-67001 Svs Door Sensor Assy w Screws Serv
- Q1273-60255 Svs station complete MR serv
- Q1273-60046 SVS station complete SERV, Part Q1273-60046 is no longer supplied. Please order the replacement, Q1273-60255
- Q1273-60072 Switch sensor front door SERV
- Q1273-60256 Top cover MR serv
- Q1273-60052 Top cover SERV, Part Q1273-60052 is no longer supplied. Please order the replacement, Q1273-60256
- Q1273-60257 Vacuum fan assy MR serv
- Q1273-60048 Vacuum FAN assy SERV, Part Q1273-60048 is no longer supplied. Please order the replacement, Q1273-60257
- Q1273-60204 Window (with good ribs) serv
- Q1273-60057 Window SERV
- Q1271-60456 X-brace hardware assy serv, Part Q1271-60456 is no longer supplied. Please order the replacement, Q1271-60743
Besoin d'assistance ? Nous pouvons prendre la main à distance.
Télécharger TeamViewerNous contacter
Votre HP DesignJet 4000, 4020, 4500 et 4520 est en panne ?
Appelez directement notre expert ou remplissez le formulaire de contact. Pas de serveur vocal, pas d'attente.
Nous vous répondons en général en moins de 2 heures.
- 04 78 01 03 24
- info@traceur-lyon.fr
- 23 bis rue Victor et Roger Thomas
69008 Lyon
Devis sous 2h
Demandez votre devis HP DesignJet 4000, 4020, 4500 et 4520
Décrivez votre panne (code erreur affiché, symptôme constaté). Nous vous rappelons sous 2 h avec un devis personnalisé.
- Diagnostic gratuit par téléphone
- Réponse sous 2 heures
- Intervention sur site en 48 h en Rhône-Alpes
- Pièces du 4000, 4020, 4500 et 4520 en stock à Lyon
- Dépannages garantis 1 an sur site