
Prise en charge intégrale
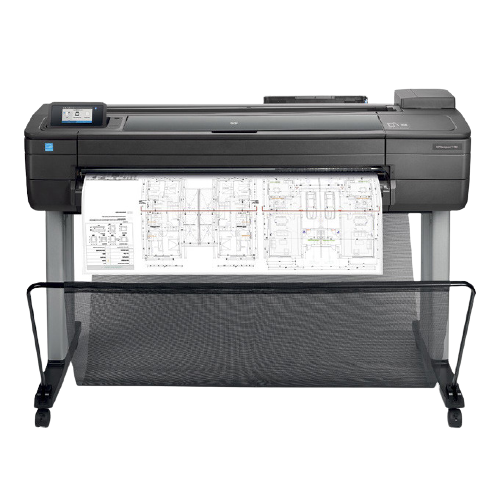
Dépannage et réparation HP DesignJet T730
à Lyon et en Rhône-Alpes
Spécialistes HP DesignJet depuis 1994.
Nous prenons en charge votre HP DesignJet T730 de A à Z.
30 années d'expertise
Spécialiste HP DesignJet depuis 1994
Un technicien, pas un standard
Vous parlez directement à un expert
Devis en 2 heures
Intervention sur site en 48 h
Rhône-Alpes
Lyon, Grenoble, Annecy, Chambéry…
VOTRE TRACEUR T730 EST EN PANNE ?
Dépannage et réparation du HP DesignJet T730 sur site
Basés à Lyon, nous sommes idéalement situés pour dépanner et réparer votre HP DesignJet T730 dans toute la région Rhône-Alpes.
Avec plus de 30 années d'expérience, nous dépannons et réparons tous les modèles HP DesignJet, des versions les plus anciennes aux dernières générations.
Chez nous, les modèles que d'autres services déclarent obsolètes ou irréparables restent réparables encore longtemps. Et si la réparation échoue, l'intervention ne vous est pas facturée.
Ce que comprend notre intervention sur votre HP DesignJet T730
- Diagnostic gratuit par téléphone
- Devis de dépannage précis en 2 heures
- Dépannage en Rhône-Alpes en 48 heures
- Réparation de toutes les pannes
- Tarifs raisonnables et transparents
- Toutes les pièces détachées en stock
- Toutes nos interventions garanties 1 an sur site
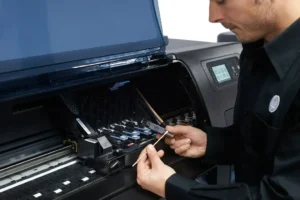
Chaque dépannage réalisé sur votre HP DesignJet T730 est couvert par une garantie 1 an sur site : si la panne réparée se reproduit dans l'année, nous revenons chez vous sans frais, pièce et main-d'œuvre comprises.
Remplacement de la courroie + révision complète : À partir de 360 € HT
Votre traceur HP DesignJet T730 affiche un code erreur 86:01 ou la courroie est déchirée ?
Notre technicien intervient sur site pour remplacer la courroie dans les règles de l'art. Le remplacement inclut le nettoyage interne complet du traceur — pas question de poser une courroie neuve dans un appareil encrassé.
Une fois la courroie remplacée, notre technicien teste la qualité d'impression, nettoie les têtes d'impression et optimise les réglages. Au départ du technicien, votre HP DesignJet T730 aura droit à une seconde jeunesse.
Avant d'engager une réparation lourde, il vaut la peine de se demander si elle en vaut encore la peine : notre page réparer ou remplacer son traceur donne les cinq critères que nous passons en revue au téléphone. Et si le remplacement s'impose, nous rachetons votre HP DesignJet T730, en état de marche ou non.
VOUS AVEZ BESOIN DE CARTOUCHES D'ENCRE ?
Nous avons en stock toutes les cartouches pour HP DesignJet T730
- Stock important et permanent
- Livraison en 24h à Lyon — 48h France entière
- Cartouches originales HP uniquement
- Têtes d'impression également disponibles
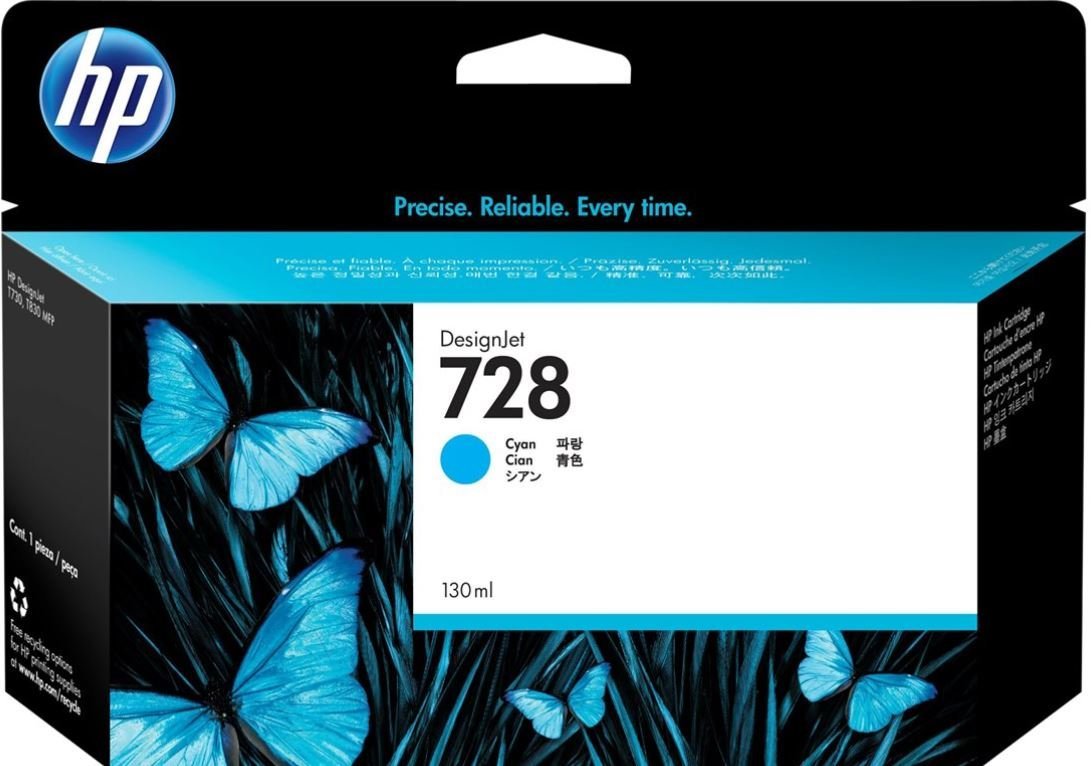
F9J67A HP 728
99 €HT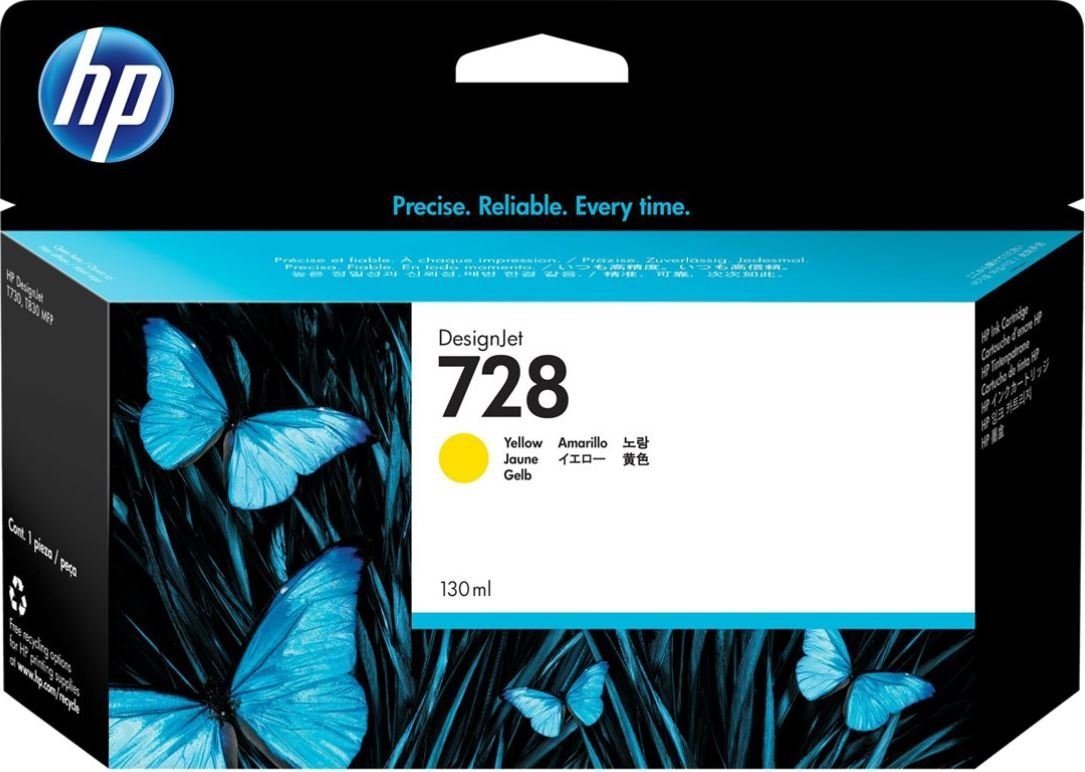
F9J65A HP 728
99 €HT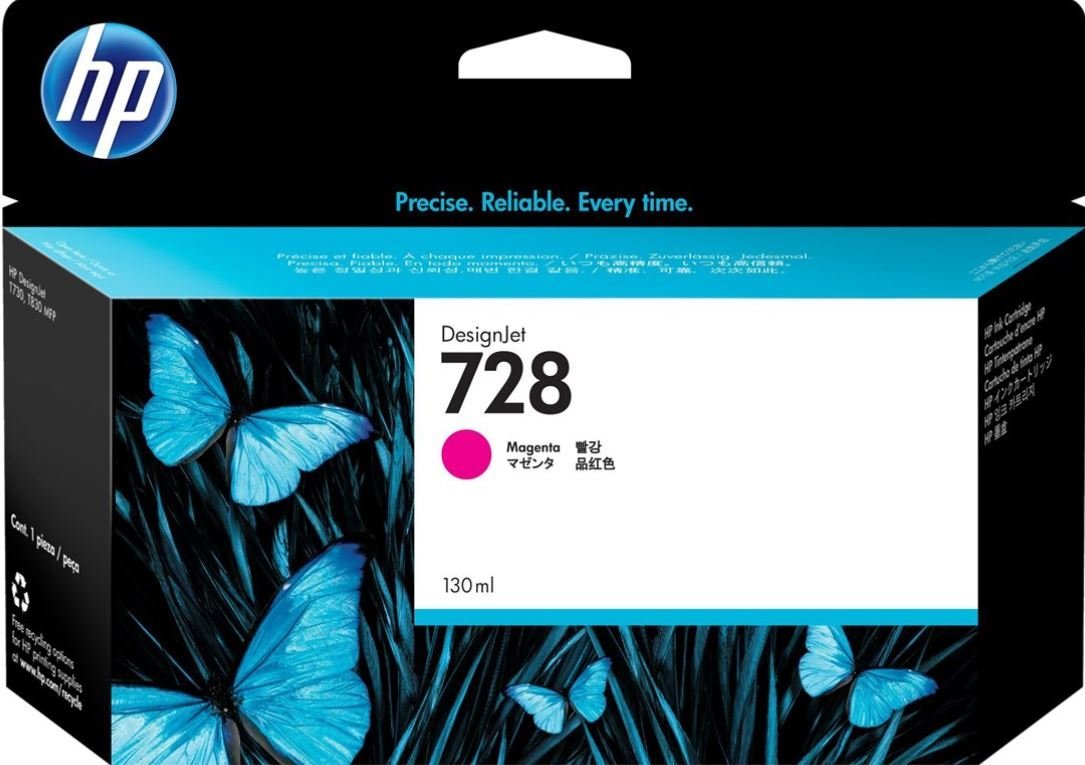
F9J66A HP 728
99 €HT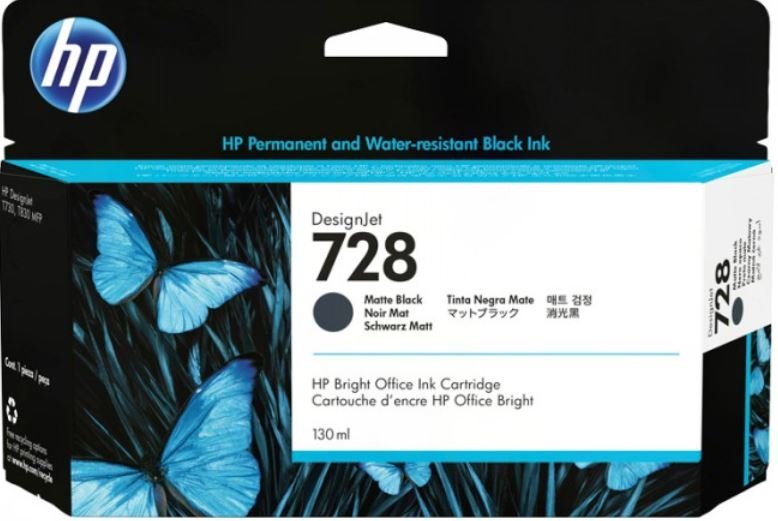
3WX25A HP 728
99 €HT F9K17A HP 728
185 €HT F9K17A HP 728
149 €HT F9K15A HP 728
185 €HT F9K15A HP 728
149 €HT F9K16A HP 728
185 €HT F9J68A HP 728
185 €HTFaites défiler dans le cadre pour voir toutes les cartouches correspondant à votre modèle.
Prolongez la vie de votre traceur
Contrat de maintenance
Pour HP DesignJet T730
Inclus dans les trois formules
- Nettoyage interne, graissage…
- Contrôle courroie, service station...
- Mise à jour firmware, réglages
- Tests d'impression, amélioration qualité
- Assistance téléphonique illimitée
- Télémaintenance avec TeamViewer
- Priorité sur les dépannages - garantis en 48h
En plus avec Privilège et Premium
- Main-d'œuvre illimitée incluse
- Déplacements illimités inclus
En plus avec Premium uniquement
- Pièces détachées incluses
- Carte mère incluse
- Remplacement préventif des pièces d'usure

RESSOURCES TECHNIQUES
Tout ce dont vous avez besoin sur le HP DesignJet T730
Toutes nos ressources et nos 30 années d'expérience à votre disposition.
Pilotes d'impression, utilitaire d'impression PDF, codes erreur, pannes fréquentes, nomenclature des pièces détachées
Codes erreur fréquents
Chaque code renvoie à une pièce défectueuse précise — cliquez sur + pour l'explication complète
-
21:10 ou 21:13 ou 21.2:13 ou message «Maintenance recommandée»
Un traceur HP DesignJet T730 qui affiche un code erreur 21:10 ou 21:13 indique qu’il y a un problème de Station Service.
+le code erreur 21:10, 21:13, 21.2:13 indique que la station service est HS. La Station service doit être remplacée.
Cause :
La station service du traceur HP DesignJet T730 est HS ou bien le chariot du traceur HP DesignJet T730 est bloqué dans la station service. Ce message peut être aléatoire au début. Redémarrer le traceur HP DesignJet T730 peut être suffisant pour faire disparaitre le message et utiliser le traceur HP DesignJet T730. Mais en général un traceur HP DesignJet T730 qui fait une erreur 21:10 ou 21:13 le fait à nouveau, et l’erreur 21:10 ou 21:13 devient permanente et bloquante. Il faut alors faire intervenir un technicien pour remplacer la pièce défectueuse. Il arrive également que le traceur HP DesignJet T730 affiche une erreur 21:10 ou 21:13 si la courroie est usée, le chariot pouvant alors se bloquer dans la Station Service. Dans ce cas, la pièce à remplacer sera la courroie et non la Station Service. Dès la première apparition du code erreur sur l’écran de votre traceur HP DesignJet T730, faites-nous intervenir pour éviter un problème qui tôt ou tard bloquera votre traceur HP DesignJet T730 et votre production.
Intervention technicien :
Prévoir une intervention de 1 heure + déplacement + pièce (station service).
-
86:01 ou Vérifier chemin des têtes d'impression ou Vérifier chemin papier
Un traceur HP DesignJet T730 HP Designjet qui affiche un code erreur 86:01 indique que le chariot est bloqué.
+le code erreur 86:01 indique généralement que la courroie est HS.
Son remplacement est complexe car il nécessite un démontage important.
Notre technicien en profite pour faire une révision générale du traceur HP DesignJet T730 (nettoyage, graissage, optimisation de la qualité d'impression...)Cause :
L’erreur 86:01 peut être causée par un bourrage papier causé par un intrus (morceau de papier...), mais la plupart du temps, le code erreur 86:01 survient quand la courroie du traceur HP DesignJet T730 est HS (usée, déchirée...). En général ce message est bloquant. HP prévient le remplacement de la courroie tous les 5 ans. Votre traceur HP DesignJet T730 ne fonctionnera à nouveau que quand le problème sera résolu ou que quand la courroie du traceur HP DesignJet T730 sera remplacée.
Intervention technicien :
Le remplacement de la courroie de traceur HP DesignJet T730 fait partie des interventions les plus courantes sur les traceurs HP Designjet. Chez Traceur HP DesignJet T730 Lyon le technicien en profite pour faire une révision complète du traceur HP DesignJet T730 : Nettoyage, graissage, contrôle général, contrôle de la qualité d’impression… Remplacer une courroie de traceur HP DesignJet T730 est une intervention très minutieuse. Une courroie de traceur HP DesignJet T730 remplacée par un technicien non spécialiste pourra engendrer un code erreur et la panne complète du traceur HP DesignJet T730. La remise en état conséquente à une mauvaise intervention pouvant s’avérer bien plus complexe et plus couteuse que le simple remplacement de la courroie. En général prévoir une intervention de 2 heures + déplacement + fourniture de la courroie.
-
Echec de l'imprimante, incident sur l'imprimante (ou le système d'encrage...)
Un traceur HP DesignJet T730 qui affiche ce message a un problème avec la tête d'impression.
+ce message indique que la tête d'impression est HS.
Il faut remplacer la tête d'impression.Cause :
La tête d'impression est HS.
Intervention technicien :
Il faut remplacer la tête d'impression.
Prévoir une intervention d'une heure + déplacement + fourniture de la tête d'impression. -
Echec de chargement du support...
Un traceur HP DesignJet T730 qui affiche ce message a un problème de capteur du chariot.
+ce message indique que le capteur du chariot est sale ou HS. En général les salissures sont causées par des coulures d'encre causées par la tête d'impression du traceur HP DesignJet T730.
Il faut nettoyer ou remplacer le capteur du chariot.
En général il faut également remplacer la tête d'impression du traceur HP DesignJet T730.Cause :
Le capteur du chariot est sale ou HS.
Intervention technicien :
Il faut nettoyer ou remplacer le capteur papier du chariot , nettoyer le traceur HP DesignJet T730 et éventuellement remplacer la tête d'impression.
Prévoir une intervention d'une heure + déplacement + fourniture éventuelle du capteur papier et/ou de la tête d'impression.

Le code erreur affiché n'est pas dans la liste ?
N'hésitez pas à nous appeler, nous vous guidons par téléphone.
Tous les codes erreur
Traduction française par IA — en cas de doute sur une procédure, vérifiez le texte anglais d'origine (bouton EN).
Aucun résultat — contactez-nous
-
0000-0059
+00.00. Unknown Service Part
Causes : 59. MOTOR_SERVO_SHUTDOWN -
0001-0082
+Real Time Clock (RTC) Battery ran down.
Causes :Solution :
How to solve. Remote troubleshooting (call agent) 1. The call agent asks the customer to go to the Support Menu by pressing the Power key continuously for 15 seconds. 2. Go to the Diagnostics Menu and select RTC Battery Status to check whether the RTC Battery has actually expired. 3. If yes, the call agent should arrange a service engineer visit to replace the RTC battery by replacing the Main PCA. Main PCA Onsite troubleshooting and solution (service engineer)1. Replace the Main PCA, see Mai
-
0004-0001
+Printer Bundle Board communication failure or malfunction
Causes : Bundle FFC, Main PCASolution :
How to solve. Remote troubleshooting (call agent)1. Switch the power off and disconnect the power cord. Reconnect the power cord and power on the printer.2. The call agent should arrange a service engineer visit to change the Bundle PCA and follow steps below on Onsite Troubleshooting: Printer Bundle Board3. If a different system error is displayed then the call agent should perform the applicable troubleshooting procedure.Onsite troubleshooting and solution (service engineer)1. Remove covers
-
0008-0001
+Front Panel does not respond
Causes :Solution :
Onsite troubleshooting and solution (service engineer)1. This error never appears in the Front Panel, it is only logged into the Error History, and is equivalent to the 3 beeps during printer startup.2. It happens when there is no communication between the Front Panel and the Main PCA, see Printer shows Resuming Screen during OOBE.
-
0009-0101
+Scanner Bundle Board PCA
Causes : Main PCASolution :
Remote troubleshooting (call agent)1. Switch the power off and disconnect the power cord. Reconnect the power cord and power on the printer.2. The call agent should arrange a service engineer visit to change the Scanner Bundle PCA, and follow the Onsite troubleshooting below: Scanner Bundle Board. Board3. If a different system error is displayed then the call agent should perform the applicable troubleshooting procedure.Onsite troubleshooting and solution (service engineer)1. Remove covers an
-
0009-0174
+Scanner bundle PCA Non-volatile memory issue
Causes :Solution :
Remote troubleshooting (call agent)1. Switch the unit off and on again.2. If the problem persist, go to the Extended support menu and use the saved Scanner calibrations.Onsite troubleshooting and solution (service engineer) Ensure the Main and Scan Bundle Board are properly connected, or replace Scan Bundle Board.
-
0009-0201
+Scanner Motor failure
Causes : Motor, transmission, pinches, or advance rollersSolution :
Remote troubleshooting (call agent)1. Switch the power off and disconnect the power cord. Reconnect the power cord and power on the printer.2. Enter the support menu, see Entering the support menus, and run the Scanner Media Drive diagnostics test.3. Depending on the result, the call agent should arrange a service engineer visit to change the scanner motor and transmission, or any of the service parts involved on the media drive.Onsite troubleshooting and solution (service engineer)1. Replace
-
0009-0301
+Scanbar failure
Causes :Solution :
Remote troubleshooting (call agent)1. Switch the power off and disconnect the power cord. Reconnect the power cord and power on the printer. If the error persist, the call agent should arrange a service engineer visit.2. Print the scanner diagnostic plot or calibrate it.3. Scan it and check the result.Onsite troubleshooting and solution (service engineer)1. Check the Scanbar connections to the main PCA.2. Replace the Scanbars set, see Scanbars F9A3-6717 (HP DesignJet T83 MFP only). NOTE:Pl
-
0009-0401
+Scanner Slider failure
Causes :Solution :
Remote troubleshooting (call agent) Ask the customer to open the scanner lid and check:1. That none of the sliders surface is stained, dirty or showing symptoms of wear.2. That the sliders aren’t blocked, either:a. In Z (vertical) (the springs should push the slider against the Scanbar when the lid is closed) or;b. In Y (they move back and forth when the lid is open and the paper motion wheels are moved by hand).Onsite troubleshooting and solution (service engineer)1. If the sliders are
-
0021-0017
+Service station is not able to move all the way
Causes : Print Bundle PCASolution :
Remote troubleshooting (call agent)1. Switch the power off and disconnect the power cord.2. Open the PHA door and look for paper remains that could be blocking the SVS movement.3. Reconnect the power cord and power on the printer.4. The call agent should arrange a service engineer visit to change the Service Station, and follow the Onsite troubleshooting below: Service station assembly5. If a different system error is displayed then the call agent should perform the applicable troubleshooting
-
0021-0059
+21.00. Service station assy
Causes : 59. MOTOR_SERVO_SHUTDOWN -
0021-0132
+Weak primer motor or underpowered motor
Causes : Print Bundle PCASolution :
Remote troubleshooting (call agent)1. Switch the power off and disconnect the power cord. Reconnect the power cord and power on the printer.2. If the issue persists, the call agent should arrange a service engineer visit to change the Priming motor, and follow the Onsite troubleshooting below: Priming motor assembly3. If a different system error is displayed then the call agent should perform the applicable troubleshooting procedure.Onsite troubleshooting and solution (service engineer)1. Swi
-
0021-0161
+Priming motor or electrical failure
Causes : Print Bundle PCASolution :
Remote troubleshooting (call agent)1. Switch the power off and disconnect the power cord. Reconnect the power cord and power on the printer.2. If the issue persists, the call agent should arrange a service engineer visit to change the Priming motor, and follow the Onsite troubleshooting below: Priming motor assembly3. If a different system error is displayed then the call agent should perform the applicable troubleshooting procedure.Onsite troubleshooting and solution (service engineer)1. Swi
-
0021-0180
+Air Leak in Priming System
Causes : Prime pumpSolution :
Remote troubleshooting (call agent)1. Switch the power off and disconnect the power cord. Reconnect the power cord and power on the printer.2. The call agent should arrange a service engineer visit to check or replace the prime air circuit, and follow the Onsite troubleshooting below.3. If a different system error is displayed then the call agent should perform the applicable troubleshooting procedure.Onsite troubleshooting and solution (service engineer)1. Switch the power off and disconnect
-
0024-0000
+The ink does not flow to the PHA during the PHA startup process
Causes : PHA, ISS, RIDSSolution :
Remote troubleshooting (call agent)1. Ask the customer to try the process again. Reseat the PHA and ensure the ink tube connections are correct. Also ask the customer to check supplies are properly inserted. Customer should see a green lock in the tubes, see Ink Tubes (RIDS). 2. Ask the customer to check the error log (EWS or Front Panel) and list/send the full error log. The last 2 ciphers of the error code indicate the specific PHA failure. The call agent will note the complete system error
-
0024-1000
+Out of ink ,faulty or missing cartridge during the PHA startup process
Causes : SuppliesSolution :
Remote troubleshooting (call agent)1. This error can show up if any of the supplies has popped out during the ink pumping sequence. Ask the customer to open the ISS door and check that all the supplies are well in position. If any of the supplies has popped out, ask the customer to reinsert it/them and retry the startup.2. If all the supplies were well inserted, ask the customer to try the process again with a new supply. It is not required to replace the PHA as the same one can be used to re
-
0024-1100
+Out of ink detected in altered supplies during the startup process
Causes : PHASolution :
Remote troubleshooting (call agent)1. Ask the customer to try the process again with a new unused HP supply. It is not required to replace the PHA as the same one can be used to retry the process.2. The last 2 ciphers of the error code indicate the specific PHA failure. The call agent will note the complete system error for failure analysis later.
-
0026-0061
+ISS motor stall or bad encoder disc
Causes :Solution :
Remote troubleshooting (call agent)1. Restart the unit. If the problem persists, then:2. Run Service diagnostic test to verify ISS.3. Arrange visit with ISS Service kit.Onsite troubleshooting and solution (service engineer)1. Run ISS diagnostic test. If issue persists, then:2. Replace the ISS, see ISS. 3. Run the Service diagnostics test to verify ISS motor and sensors.
-
0026-0075
+26.00. ISS
Causes : 75. Generic Ink supply failure -
0026-0085
+26.00. ISS
Causes : 85. Empty supplies -
0026-0092
+26.00. ISS
Causes : 92. Too early empty supplies -
0026-0093
+26.00. ISS
Causes : 93. EE failure -
0026-0094
+26.00. ISS
Causes : 94. Non OOI cartridge failure -
0026-0100
+ISS Optotrip failure
Causes :Solution :
Remote troubleshooting (call agent)1. Switch the power off and disconnect the power cord. Reconnect the power cord and power on the printer.2. Go to Support Menu, see Entering the support menus and run the ISS diagnostic test, see 4.12 ISS. 3. Depending on the result, the call agent should arrange a service engineer visit to change the ISS.Onsite troubleshooting and solution (service engineer)1. Ensure the ISS cables are properly fit, and reconnect them as needed.2. Ensure there isn’t a
-
0026-0200
+ISS Bongo Malfunction
Causes :Solution :
Check ink supplies. Ensure they are genuine HP ink supplies.
-
0026-XXXX
+Silent S.E. for troubleshooting
Causes :Solution :
Remote troubleshooting (call agent)1. Remove, clean and reseat PHA kit. Also, check if ink tubes latch and PHA latch are properly closed (Green Lock).2. The last 2 ciphers of the error code indicate the specific PHA failure. The call agent will note the complete system error. for later failure analysis.3. If the PHA is still in warranty, the call agent will arrange a shipment with a PHA replacement.
-
0027-000027-005652
+27.00. Printhead
Causes : "PHA error: VPP cal out of range" -
0027-0001
+27.00. Printhead
Causes : "Generic PHA error" -
0027-0002
+27.00. Printhead
Causes : "PHA error: not responding at all" -
0027-0003
+27.00. Printhead
Causes : "PHA error: CSIO xfer completed incorrectly" -
0027-0004
+27.00. Printhead
Causes : "PHA error: Watchdog fault" -
0027-0005
+27.00. Printhead
Causes : "PHA error: Auric data reset" -
0027-0006
+27.00. Printhead
Causes : "PHA error: Unrecognized pen type" -
0027-0007
+27.00. Printhead
Causes : "PHA error: LVDS error" -
0027-0008
+27.00. Printhead
Causes : "PHA error: Pen ID invalid" -
0027-0009
+27.00. Printhead
Causes : "PHA error: Pen ID b/f" -
0027-0010
+27.00. Printhead
Causes : "PHA error: Pen ID write failure" -
0027-0011
+27.00. Printhead
Causes : "PHA error: Bad DTSR" -
0027-0012
+27.00. Printhead
Causes : "PHA error: Temp out of range" -
0027-0013
+27.00. Printhead
Causes : "PHA error: Temp out of range" -
0027-0014
+27.00. Printhead
Causes : "PHA error: TSR fault" -
0027-0015
+27.00. Printhead
Causes : "PHA error: Pen stuck cold" -
0027-0016
+27.00. Printhead
Causes : "PHA error: Pen not heating" -
0027-0017
+27.00. Printhead
Causes : "PHA error: VDD short" -
0027-0018
+27.00. Printhead
Causes : "PHA error: VDD short" -
0027-0019
+27.00. Printhead
Causes : "PHA error: VDD expected on" -
0027-0020
+27.00. Printhead
Causes : "PHA error: VPP short" -
0027-0021
+27.00. Printhead
Causes : "PHA error: VPP short" -
0027-0022
+27.00. Printhead
Causes : "PHA error: VPP short" -
0027-0023
+27.00. Printhead
Causes : "PHA error: VPP short" -
0027-0024
+27.00. Printhead
Causes : "PHA error: VPP short test" -
0027-0025
+27.00. Printhead
Causes : "PHA error: VPP short test" -
0027-0026
+27.00. Printhead
Causes : "PHA error: VPP expected off" -
0027-0027
+27.00. Printhead
Causes : "PHA error: VPP out of range" -
0027-0027-00560051
+27.00. Printhead
Causes : "PHA error: VPP bleed failed" -
0027-0028
+27.00. Printhead
Causes : "PHA error: VPP out of range" -
0027-0029
+27.00. Printhead
Causes : "PHA error: VPP out of range" -
0027-0030
+27.00. Printhead
Causes : "PHA error: VPP out of range" -
0027-0031
+27.00. Printhead
Causes : "PHA error: VPP out of range" -
0027-0032
+27.00. Printhead
Causes : "PHA error: VPP out of range" -
0027-0033
+27.00. Printhead
Causes : "PHA error: VPP bleed failed" -
0027-0034
+27.00. Printhead
Causes : "PHA error: VDD check timeout" -
0027-0035
+27.00. Printhead
Causes : "PHA error: VPP check timeout" -
0027-0036
+27.00. Printhead
Causes : "PHA error: VPP bleed fuse" -
0027-0037
+27.00. Printhead
Causes : "PHA error: VPP bleed fuse" -
0027-0038
+27.00. Printhead
Causes : "PHA error: VDD too many ignored" -
0027-0039
+27.00. Printhead
Causes : "PHA error: VPP too many ignored" -
0027-0040
+27.00. Printhead
Causes : "PHA error: VPP too many ignored" -
0027-0041
+27.00. Printhead
Causes : "PHA error: VDD check timeout" -
0027-0042
+27.00. Printhead
Causes : "PHA error: VPP check timeout" -
0027-0043
+27.00. Printhead
Causes : "PHA error: VDD check timeout" -
0027-0044
+27.00. Printhead
Causes : "PHA error: VPP check timeout" -
0027-0045
+27.00. Printhead
Causes : "PHA error: VDD on" -
0027-0046
+27.00. Printhead
Causes : "PHA error: VPP on" -
0027-0047
+27.00. Printhead
Causes : "PHA error: VPP setpoint failed" -
0027-0048
+27.00. Printhead
Causes : "PHA error: VPP setpoint failed" -
0027-0049
+27.00. Printhead
Causes : "PHA error: VPP bleed failed" -
0027-0050
+27.00. Printhead
Causes : "PHA error: VPP bleed failed" -
0027-0053
+27.00. Printhead
Causes : "PHA error: VPP bleed failed" -
0027-0054
+27.00. Printhead
Causes : "PHA error: VPP bleed failed" -
0027-0055
+27.00. Printhead
Causes : "PHA error: VPP bleed failed" -
0027-0056
+27.00. Printhead
Causes : "PHA error: VPP expected on" -
0027-0057
+27.00. Printhead
Causes : "PHA error: ecc out of range" -
0027-0058
+27.00. Printhead
Causes : "PHA error: ecc out of range" -
0027-0059
+27.00. Printhead
Causes : "PHA error: missing" -
0027-0060
+27.00. Printhead
Causes : "PHA error: wrong part" -
0027-0061
+27.00. Printhead
Causes : "Power on with Filled PHA Change" -
0027-0062
+27.00. Printhead
Causes : "Power on with Empty PHA Change" -
0027-0063
+27.00. Printhead
Causes : "PHA change with Filled PHA" -
0027-0064
+27.00. Printhead
Causes : "PHA change with Empty PHA" -
0027-0065
+27.00. Printhead
Causes : "Out of cap with Filled PHA Change" -
0027-0066
+27.00. Printhead
Causes : "Out of cap with Empty PHA Change" -
0027-0067
+27.00. Printhead
Causes : "Fake PHA Change" -
0041-0017
+Unable to move Paper Servo or no feedback received.
Causes : Feed Encoder Sensor PCA, Feed Index Sensor PCA, Feed Encoder DiskSolution :
Remote troubleshooting (call agent)1. Switch the power off and disconnect the power cord. Reconnect the power cord and power on the printer.2. The call agent asks the customer to go to Support Menu by pressing the Power key continuously for 15 seconds.3. Go to Diagnostic Menu, see Entering the support menus and run Paper Servo diagnostic, see 4.4 Paper servo. 4. After running the diagnostic the printer will show one of these system errors: 81-8 arrange a service engineer to replace Paper
-
0042-0117
+Unable to move Carriage Servo or no feedback received.
Causes : Trailing Cables, Carriage Board, Carriage Motor, Carriage Belt, Encoder StripSolution :
Remote troubleshooting (call agent)1. Switch the power off and disconnect the power cord. Reconnect the power cord and power on the printer.2. The call agent asks the customer to go to Support Menu by pressing the Power key continuously for 15 seconds.3. Go to Diagnostic Menu, see Entering the support menus and run Carriage Servo diagnostic, see 4.3 Carriage servo. 4. The call agent should arrange a service engineer visit to change the carriage motor.Onsite troubleshooting and solution (servi
-
0043-0017
+Unable to move Pick Servo or no feedback received.
Causes :Solution :
Onsite troubleshooting and solution (service engineer)1. Remove the covers and check that all the cables are well connected to the Printer Bundle Board (right side of the unit), specially the pick motor cable, and none of them are damaged. If any cable is not connected, then reconnect it, and power on the printer again to check whether the system error has disappeared. Check right hand gear train for blockage or damage.IMPORTANT:If any cable is damaged, then order a Cable Service Kit: Cables
-
0043-0059
+43.00. Pick motor
Causes : 59. MOTOR_SERVO_SHUTDOWN -
0045-0017
+Unable to move Rewind Servo or no feedback received.
Causes : Main PCASolution :
Remote troubleshooting (call agent)1. Switch the power off and disconnect the power cord. Reconnect the power cord and power on the printer.2. Remove the spindle, check the spindle gear and gear cap position. Check rewinder gears for damage. Finally, boot the unit without the spindle.3. The call agent should arrange a service engineer visit to change the Rewinder module, and follow the Onsite troubleshooting below: Left Roll Support4. If a different system error is displayed then the call age
-
0045-0059
+45.00. Rewinder motor
Causes : 59. MOTOR_SERVO_SHUTDOWN -
0051-0101
+Top (SFP) or Front (MFP) Cover sensor failureOther
Causes : Main PCASolution :
Remote troubleshooting (call agent)1. Switch off the printer, and disconnect the power cord. Reconnect the power cord and power on the printer.2. The call agent asks the customer to go to Support Menu by pressing the Power key continuously for 15 seconds.3.Top Cover Sensor can be tested opening and closing the window (see 4.14 Additional Manual Sensor Test (not included in the Service Menu)).4. The call agent should arrange a service engineer visit to change the Top Cover Sensor PCA; follow t
-
0051-0201
+PHA door sensor failure
Causes : Main PCASolution :
Remote troubleshooting (call agent)1. Switch off the printer, and disconnect the power cord. Reconnect the power cord and power on the printer.2. The call agent asks the customer to go to Support Menu by pressing the Power key continuously for 15 seconds.3.PHA door sensor can be tested opening and closing the PHA door (see 4.14 Additional Manual Sensor Test (not included in the Service Menu)).4. The call agent should arrange a service engineer visit to change the PHA door Sensor PCA; follow t
-
0051-0301
+Ink Cartridge door sensor failure
Causes : Main PCASolution :
Remote troubleshooting (call agent)1. Switch off the printer, and disconnect the power cord. Reconnect the power cord and power on the printer.2. The call agent asks the customer to go to Support Menu by pressing the Power key continuously for 15 seconds.3. Go to Diagnostic Menu, see Entering the support menus and run Ink door Sensor diagnostic, see 4.14 Additional Manual Sensor Test (not included in the Service Menu). 4. The call agent should arrange a service engineer visit to change the In
-
0053-0101
+OOP (Out-Of-Paper) Sensor failure
Causes : Bundle PCA, Bundle FFC, Main PCASolution :
Remote troubleshooting (call agent)1. Switch off the printer, and disconnect the power cord. Reconnect the power cord and power on the printer.2. The call agent should recommend the customer to power off the printer, remove the Multi-tray sheet module, and check that there is no paper behind it, then power on the printer to see whether the error continues.3. Ask the customer to check if the OOPS sensor is not dislodged from its location. If yes, reseat the OOPS sensor.4. The call agent asks t
-
0053-0201
+Output Tray sensor failure
Causes : Main PCA, Output traySolution :
Remote troubleshooting (call agent)1. Switch off the printer, and disconnect the power cord. Reconnect the power cord and power on the printer.2. The call agent asks the customer to go to Support Menu by pressing the Power key continuously for 15 seconds.3. Go to Diagnostic Menu, see Entering the support menus and run Output Tray Sensor diagnostic, see 4.6 Output Tray Sensor. 4. The call agent should send to the customer the Output Tray Sensor, which is a CSR part. Output Tray Sensor Assembly
-
0059-0190
+Conflict found between NVM main and backup
Causes :Solution :
Onsite troubleshooting and solution (service engineer)1. The error appears if during a service operation, the Main PCA or the NVM backup PCA are replaced by a reused part (not a new spare part).2. To recover, repair using HP genuine new spare parts.
-
0059-0191
+Default data found in both NVM main and backup
Causes :Solution :
Onsite troubleshooting and solution (service engineer)1. The error appears if during a service operation, the Main PCA and the NVM backup PCA are replaced at the same time.2. To recover, repair by changing first one component (use the old component for this printer), then power the printer off and on, and change the other.
-
0059-0289
+NVM backup is missing or does not work correctly (NVM location, see Locations of the PCAs).
Causes :Solution :
Remote troubleshooting (call agent) Restart the unit. If the problem persists, then:Onsite troubleshooting and solution (service engineer)1. Remove left cover, see Left Cover MFP SV Kit F9A3-6712, and ensure NVM backup cable is properly connected to it and to the Main PCA.2. Replace the NVM backup.
-
0081-0008
+81.00. Media advance
Causes : 08. JAM -
0085-0101
+Feed index encoder sensor does not work properly
Causes : Feed Encoder Disk, Main PCASolution :
Remote troubleshooting (call agent)1. Switch off the printer, and disconnect the power cord. Reconnect the power cord and power on the printer.2. The call agent should arrange a service engineer visit to change the Feed Index PCA and follow onsite troubleshooting below. Feed Index encoder sensor PCA3. If a different system error is displayed then the call agent should perform the applicable troubleshooting procedure.Onsite troubleshooting and solution (service engineer)1. Remove the covers an
-
0085-0201
+Feed encoder sensor does not work properly
Causes : Feed encoder Disk, Main PCASolution :
Remote troubleshooting (call agent)1. Switch off the printer, and disconnect the power cord. Reconnect the power cord and power on the printer.2. The call agent should arrange a service engineer visit to change the Feed encoder sensor PCA. Feed Encoder Sensor PCA3. If a different system error is displayed then the call agent should perform the applicable troubleshooting procedure.Onsite troubleshooting and solution (service engineer)1. Remove the covers and check that all the cables are well
-
0086-0008
+86.00. Scan axis jam
Causes : 08. JAM -
0087-0001
+Encoder Strip failure
Causes : Carriage (encoder sensor)Solution :
Remote troubleshooting (call agent)1. Switch off the printer, and disconnect the power cord. Reconnect the power cord and power on the printer.2. The call agent should arrange a service engineer visit to change the Encoder Strip and follow onsite troubleshooting below. Encoder Strip (36)3. If a different system error is displayed then the call agent should perform the applicable troubleshooting procedure.Onsite troubleshooting and solution (service engineer)1. Remove the covers and check that
-
0153-0302
+Multi-Sheet Tray presence not detected
Causes : MPCASolution :
Remote troubleshooting (call agent) Ensure that the Multi-Sheet Tray is properly placed and the latch is closed.Onsite troubleshooting and solution (service engineer) Ensure that the Multi-Sheet Tray sensor cable is correclty connected to the MPCA, checking the J27 connector in the MPCA.
-
0227-0046
+27.00. Printhead
Causes : 46. NOT CALIBRATED MISSALIGNED UNABLE TO CALIBRATE -
0824-0100
+24.01. Ink Blockage Long Repumps
Causes : Last 4 bits interpreted as 0=working 1=not working, order is KCMY -
0824-0200
+24.02. Ink Blockage Delays Phase
Causes : Last 4 bits interpreted as 0=working 1=not working, order is KCMY -
0824-0300
+24.03. Ink Blockage Bag Cycling Phase
Causes : Last 4 bits interpreted as 0=working 1=not working, order is KCMY -
0824-2000
+24.20. SHAID (Ink detection sensor inside PHA) not covered
Causes : Last 4 bits interpreted as 0=working 1=not working, order is KCMY -
0824-XXXX
+IDS startup problem: Silent System Errors not shown in the Front Panel. Refer to Ink supplies troubleshooting for more information, see Ink-supplies troubleshooting. See Error messages related with printhead and start-up for additional error codes.
Causes : -
0942-0188
+Carriage homing problem
Causes :Solution :
Remote troubleshooting (call agent)1. Reboot the unit. If the problem persists, clean the encoder strip, see Clean the Encoder Strip. 2. If the issue is not solved, open the PHA door and check if there’s any paper strips blocking either the carriage or the SVS.3. Go to Diagnostic Menu, see Entering the support menus and run Carriage Servo diagnostic, see 4.3 Carriage servo. Onsite troubleshooting and solution (service engineer)1. Check encoder strip, scan axis and service station parts.
Problèmes fréquents
Cliquez sur + pour voir l'explication et les solutions
-
Problème de coupe papier
Si votre traceur HP DesignJet T730 fait des bourrages au moment de couper le papier, c'est que le couteau (cutter) est HS.
+HP DesignJet T730 qui a un problème de coupe papier a le couteau HS (cutter).
Il faut remplacer le couteau.Cause :
Le problème provient d'un couteau (cutter) HS, il faut le remplacer.
Intervention technicien :
Le remplacement du couteau du traceur HP DesignJet T730 nécessite une intervention de 1 heure + déplacement + fourniture de la pièce.
-
Se bloque au démarrage
Un traceur HP DesignJet T730 qui bloque au démarrage a généralement un problème de carte mère (Carte formatter ou Main PCA ou electronic module)
+HP DesignJet T730 qui bloque au démarrage a la carte formatter ou la Main PCA HS.
Son remplacement est complexe car il nécessite un démontage important.Cause :
La carte formatter ou la Main PCA est HS, il va falloir la remplacer.
Intervention technicien :
Le remplacement de la carte nécessite l'intervention d'un technicien.
Prévoir 1 à 3 heures d'intervention + déplacement + le prix de la pièce. -
Alimenté mais ne démarre pas
Un traceur HP DesignJet T730 qui ne démarre pas a généralement un problème de carte mère (Carte formatter ou Main PCA ou electronic module).
+HP DesignJet T730 qui s'allume mais ne démarre pas a la carte formatter ou la Main PCA HS.
Son remplacement est complexe car il nécessite un démontage important.Cause :
La carte formatter ou la Main PCA est HS, il va falloir la remplacer.
Intervention technicien :
Le remplacement de la carte nécessite l'intervention d'un technicien.
Prévoir 1 à 3 heures d'intervention + déplacement + le prix de la pièce. -
L'écran reste blanc
Un traceur HP DesignJet T730 dont l'écran reste blanc (éclairé mais sans aucune inscription) a un problème de carte mère (carte formatter ou Main PCA).
+HP DesignJet T730 qui s'allume avec un écran blanc à la carte formatter ou la Main PCA HS.
Son remplacement est complexe car il nécessite un démontage important.Cause :
La carte formmater ou la Main PCA est HS, il faut la remplacer.
Intervention technicien :
1/ Identifier précisément la pièce à remplacer à l'aide des 3 voyant qui se trouvent à côté de la prise réseau.
2/ Faire intervenir un technicien pour remplacer la pièce défectueuse, prévoir 1 à 3 heures de main d'oeuvre + déplacement + la fourniture de la pièce. -
Le traceur HP DesignJet T730 ne répond pas aux ordres du PC
Le traceur HP DesignJet T730 est allumé, affiche prêt, mais ne réagit pas.
+HP DesignJet T730 qui démarre correctement mais ne répond pas aux ordres du PC a un problème de communication.
Le problème peut avoir plusieurs origines : Adresse IP mal paramétrée, mauvais pilote d'impression, câble HS...
La recherche du "coupable" peut être compliquée.Cause :
Les causes possibles sont :
- Le câble réseau est HS ou déconnecté.
- Il y a un problème d'adresse IP : Conflit d'adresse, adresse changée, box inaccessible...
- Le pilote est corrompu ou pas compatible.Auto-dépannage :
Vérifiez la connexion physique du réseau (les câbles, la box, le switch...)
Vérifiez l'adresse IP du traceur HP DesignJet T730 (changement d'adresse, absence de conflit...)
Vérifiez le pilote d'impression
Si tout est en ordre il se peut que la carte réseau du traceur HP DesignJet T730 soit HS.Intervention technicien :
Pour une interventions sur site prévoir 1 à 3 heures pour faire tous les tests étape par étape et identifier l'origine du problème + déplacement + fourniture éventuelle d'une carte réseau.
-
Pas d'alimentation électrique
Un traceur HP DesignJet T730 qui ne présente aucune trace d'alimentation électrique a probablement le bloc alimentation HS.
+HP DesignJet T730 qui n'est plus du tout alimenté a le bloc d'alimentation HS.
Son remplacement est complexe car il nécessite un démontage important.Cause :
Le bloc d'alimentation est HS, il va falloir le remplacer.
Intervention technicien :
Le remplacement du bloc d'alimentation nécessite l'intervention d'un technicien.
Prévoir 1 à 2 heures d'intervention + déplacement + le prix de la pièce. -
Problème de qualité d'impression
Votre traceur HP DesignJet T730 a une mauvaise qualité d'impression.
+HP DesignJet T730 qui a un problème de qualité d'impression (couleurs non conformes, couleurs non homogènes, traits mal formés, bavures, impressions vierge ou incomplètes...) a une tête d'impression en mauvais état.
Vous pouvez essayer de lancer une procédure de nettoyage de la tête d'impression. Si la procédure ne résout pas le problème, c'est qu'il faut remplacer la tête. Vous pouvez nous la commander et essayer de la remplacer par vous même.
En cas de doute, faites nous intervenir, notre technicien en profitera pour faire une révision du traceur HP DesignJet T730.Cause :
Il y a de fortes chances pour la tête d'impression de votre traceur HP DesignJet T730 soient usée.
La majorité des problèmes de qualité d'impression (couleurs non conformes, couleurs non homogènes, traits mal formés, bavures, impressions vierge ou incomplètes...) sont causés par une tête d'impression usée ou HS .Auto-dépannage :
Commencez par remplacer la tête d’impression de votre traceur HP DesignJet T730.
Contrairement aux cartouches, la tête d’impression de votre traceur HP DesignJet T730 n'est pas pleine ou vide.
Elle s’use au four et à mesure de son utilisation et de son âge.
Selon l’intensité et l’usage du traceur HP DesignJet T730, une tête aura une espérance de vie de plusieurs mois à plusieurs années.
Le traceur HP DesignJet T730 mémorise l’usage de la tête d’impression. Il arrive qu’un traceur HP DesignJet T730 propose ou exige le remplacement d'une tête trop usée ou en mauvais état.
Il arrive aussi que la tête d’impression soit usée et provoque de mauvaises impressions sans que le traceur HP DesignJet T730 ne signale quoi que ce soit.
Si c’est le cas, n’hésitez pas à remplacer votre tête d’impression.
Attention, le remplacement de la tête d'impression nécessite d'avoir des cartouches suffisamment pleines.Intervention technicien :
Si vous ne souhaitez pas remplacer la tête d'impression par vous-même, nous pouvons intervenir pour la remplacer, prévoir 1 heure de main d'oeuvre + déplacement + fournitures de la tête neuve + fourniture éventuelle de cartouches neuves (nécessaires au remplacement de la tête d'impression).
Si le remplacement de la tête d'impression est impossible ou si le problème n'est pas résolu, c'est que le problème est plus complexe, prévoir alors une intervention de 1 heure à 3 heures + déplacement fourniture éventuelle de pièces détachées (station service, inktube, chariot...)
Nomenclature des pièces détachées
Aucune pièce trouvée — contactez-nous
- CQ890-67001BM 48Pack - AmpXL Carriage Zim sensor SV
- CQ890-67108BM 48Pack - Cutter AXLP SCR SV KIT
- CQ893-67002 AmpXL 36 Back cover SV
- CQ893-67016 AmpXL 36 Belt SV Part CQ893-67016 is no longer supplied. Please order the replacement, F9A30-67068
- CQ893-67029 AmpXL 36 Encoder strip SV
- CQ894-67001 AmpXL 36 Front Cover SV
- CQ893-67003 AmpXL 36 Roll cover SV
- CQ893-67008 AmpXL 36 Spindle module SV
- CQ893-67022 AmpXL 36 Starwheel assy SV Repack
- CQ894-67002 AmpXL 36 Upper roll media guide SV
- CQ893-67028 AmpXL 36in PM Kit SV_Grease_Y_Lid CSR
- CQ893-67001 AmpXL 36Trailing cable SV
- CQ890-67089 AmpXL 5V Power Supply SV
- CQ890-67007 AmpXL Accessory tray SV
- CQ891-67010 AmpXL Basic Extension/Output Tray SV
- CQ890-67001 AmpXL Carriage Zim sensor SV
- CQ890-67033 AmpXL Encoder disk SV
- CQ890-67047 AmpXL Extension in the accesory tray SV
- CQ890-67044 AmpXL Left side spittoon SV
- CQ893-67018 AmpXL Output Tray Sensor SV
- CQ890-67060 AmpXL Pinches Assy SV
- CQ890-67019 AmpXL Pro Extension/Output Tray SV Part CQ890-67019 is no longer supplied. Please order the replacement, CQ891-67010
- CQ893-67009 AmpXL spindle hubs SV
- F9A30-67009 Assy Air Print CANDELA SV kit
- F9A30-67006 Assy Cutter Door SV kit CANDELA
- F9A30-67010 Assy PH Door CANDELA SV kit
- F9A30-67068 Belt 36 inches (pulley included)
- 5HB06-67028 Brush line sensor with adhesive 5 sets
- F9A30-67071B Cables Sensors 36in
- F9A30-67071 Cables Sensors 36in
- F9A30-67061 Candela Carriage Assembly Part F9A30-67061 is no longer supplied. Please order the replacement, F9A30-67069
- F9A30-67063 Candela Carriage Motor SV kit
- F9A29-67006 CANDELA Central covers SFP SV kit
- F9A30-67008 CANDELA ISS SV kit
- F9A30-67060 Candela Labels
- F9A29-67005 CANDELA Left cover SFP SV kit
- F9A30-67050 Candela Left Roll Support SV
- F9A30-67001 CANDELA MAIN PCA SV Part F9A30-67001 is no longer supplied. Please order the replacement, F9A28-67020
- F9A30-67047 Candela NVM Backup PCA SV kit
- F9A30-67053 Candela OOPS Sensor flag w/tap
- F9A30-67049 Candela Paper Motor SV kit
- F9A30-67066 Candela PM Kit SV_Grease_Y_
- F9A30-67048 Candela Prime pump SV kit
- F9A30-67004 CANDELA Print Bundle PCA SV
- F9A30-67046 Candela Printer Cables kit SV Part F9A30-67046 is no longer supplied. Please order the replacement, F9A30-67071
- F9A30-67045 Candela Printer sensor kit SV Part F9A30-67045 is no longer supplied. Please order the replacement, F9A30-67071
- F9A30-67007B CANDELA RIDS SV kit
- F9A30-67007 CANDELA RIDS SV kit
- F9A29-67004 CANDELA Right cover SFP SV kit
- F9A30-67054 Candela Right Gear Train SV
- F9A30-67051 Candela Right Roll Support SV
- F9A29-67013 Candela Screws kits
- F9A30-67052 Candela Service Station Assy
- F9A29-67007 CANDELA Top window SFP SV kit
- F9A30-67069 Carriage Assembly 36inch SV
- F9A29-67008 Control Panel and support SFP
- CQ890-67108 Cutter AXLP SCR SV KIT
- CQ890-67108B Cutter AXLP SCR SV KIT
- CQ890-67090 Cutter CSR SV kit Part CQ890-67090 is no longer supplied. Please order the replacement, CQ890-67108
- CQ890-67091 Cutter Y margin new Extract Li Part CQ890-67091 is no longer supplied. Please order the replacement, CQ890-67108
- F9J67A HP 728 130-ml Cyan Ink Crtg
- F9J66A HP 728 130-ml Magenta Ink Crtg
- 3WX25A HP 728 130ml Matte Black Ink Cartridge
- F9J65A HP 728 130-ml Yellow Ink Crtg
- F9K17A HP 728 300-ml Cyan Ink Crtg
- F9K16A HP 728 300-ml Magenta Ink Crtg
- F9J68A HP 728 300-ml Matte Black Ink Crtg
- F9K15A HP 728 300-ml Yellow Ink Crtg
- F9J63A HP 728 40-ml Cyan Ink Crtg
- F9J62A HP 728 40-ml Magenta Ink Crtg
- F9J61A HP 728 40-ml Yellow Ink Crtg
- F9J64A HP 728 69-ml Matte Black Ink Crtg
- F9J56A HP 729 Printhead
- F9J81A HP 729 Printhead Replacement Kit
- F9J59A HP Intro Cyan Ink Crtg
- F9J58A HP Intro Magenta Ink Crtg
- F9J60A HP Intro Matte Black Ink Crtg
- F9J57A HP Intro Yellow Ink Crtg
- F9A30-67014 Ink door cover SV kit
- CQ890-60244 KIT, FRICTION REPAIR
- F9A28-67020 MAIN PCA
- 5ZY61-67002 Output Platen 36in
- CQ891-60022 Power Cord: AMS SV KIT
- CQ891-60023 Power Cord: APJ SV KIT
- CQ891-60021 Power Cord: EU SV KIT
- N9M07-67001 Rugged_Case_Svkit
- F9A30-67058 Stand Basket SV kit
- F9A30-67059 Stand HW kit
- F9A30-67056 Stand Left Leg Assy
- F9A30-67057 Stand Right Leg Assy
Pilote d'impression
Télécharger →Utilitaire PDF
Télécharger →Firmware
Télécharger →Fiche technique
Télécharger →Besoin d'assistance ? Nous pouvons prendre la main à distance.
Télécharger TeamViewerNous contacter
Votre HP DesignJet T730 est en panne ?
Appelez directement notre expert ou remplissez le formulaire de contact. Pas de serveur vocal, pas d'attente.
Nous vous répondons en général en moins de 2 heures.
- 04 78 01 03 24
- info@traceur-lyon.fr
- 23 bis rue Victor et Roger Thomas
69008 Lyon
Devis sous 2h
Demandez votre devis HP DesignJet T730
Décrivez votre panne (code erreur affiché, symptôme constaté). Nous vous rappelons sous 2 h avec un devis personnalisé.
- Diagnostic gratuit par téléphone
- Réponse sous 2 heures
- Intervention sur site en 48 h en Rhône-Alpes
- Pièces du T730 en stock à Lyon
- Dépannages garantis 1 an sur site